All Posts (1994)
Sort by
Newbie here.
I see that Stew-Mac charges about $100 for their fret saw & miter box. Yikes! Does anybody know if you can use a regular miter saw & glue w/ "jumbo" sized fret wire stock? Alternatively, I have a jeweler's saw, which I see are sometimes called fret saws. Can I use that to slot for frets? How?
Thanks in advance!!
Before Fleetwood Mac became the 7o's hit radio powerhouse of the 70's they were an innovative blues band, the instrumental "albatross" has haunted me for years (in a good way) here's a stunning live version played by Rick Vito. Talk about tone and control with a slide bar!!!
https://www.youtube.com/watch?v=xMg5dLeoOAs
Oh well, back to the drawing board!. Started having all types of problems crop up, starting with gluing the box shut when I still needed to access the insides, problems compounded from there. Well suffice to say I made some quick changes and completed a fretless three-string CBG. The box was too thin for good acoustics, but is ok for The Beast (my 2 1/2 year old grandson) and his friend JoJo (6 years) to play around with. I gave JoJo a similar fretless 3-string CBG the other day.
So its on to the next build, since I have a lot of boxes left. The next build will be an acoustic three- or four-string fretted. The box is a Tequila (Cuervo 1800) box 10-3/8" X 5-5/8" X 3-1/2" which I think will resonate well. And this time I have a good sized
Building a four string cigar box guitar (part 2)
next will be cutting off the ends of the neck stock to get rid of the bad ends created by the planer and then marking our neck blanks for the 20 degree angle needed for the headstock relief and marking the cuts we need to fit the box lid. the finished neck will look something like the one in the picture below
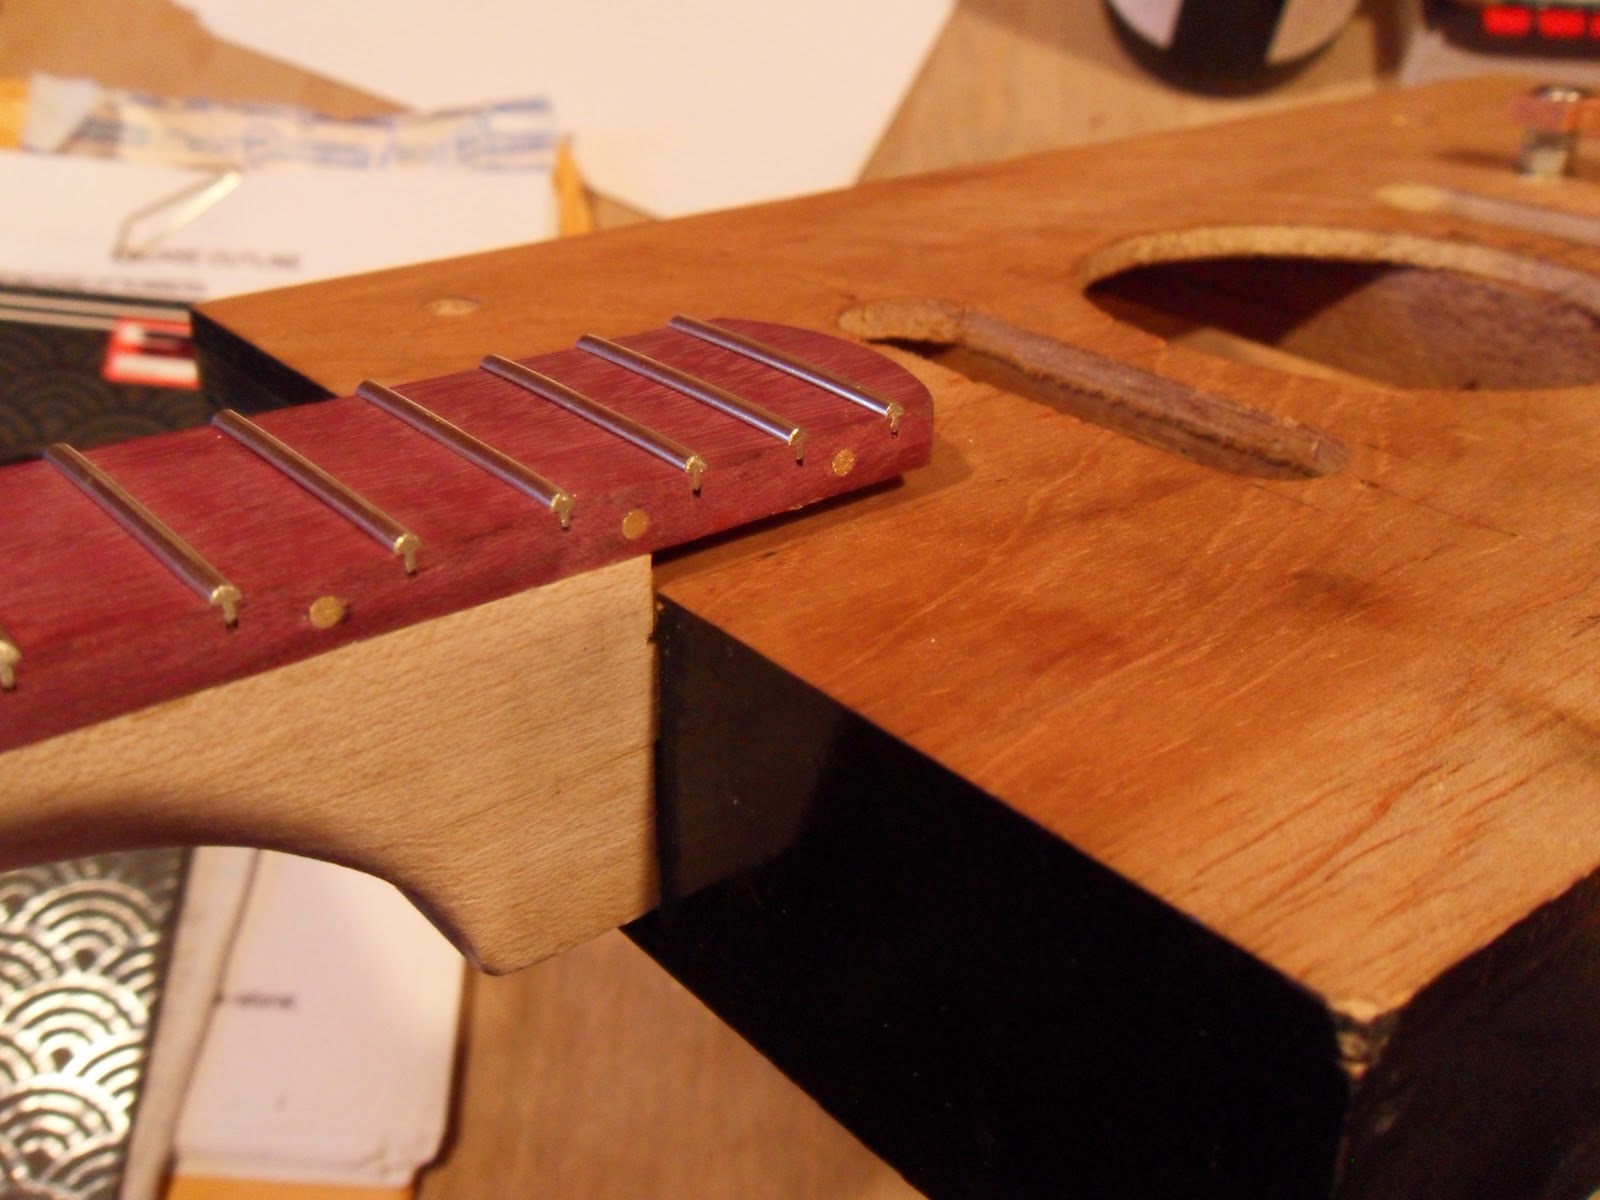
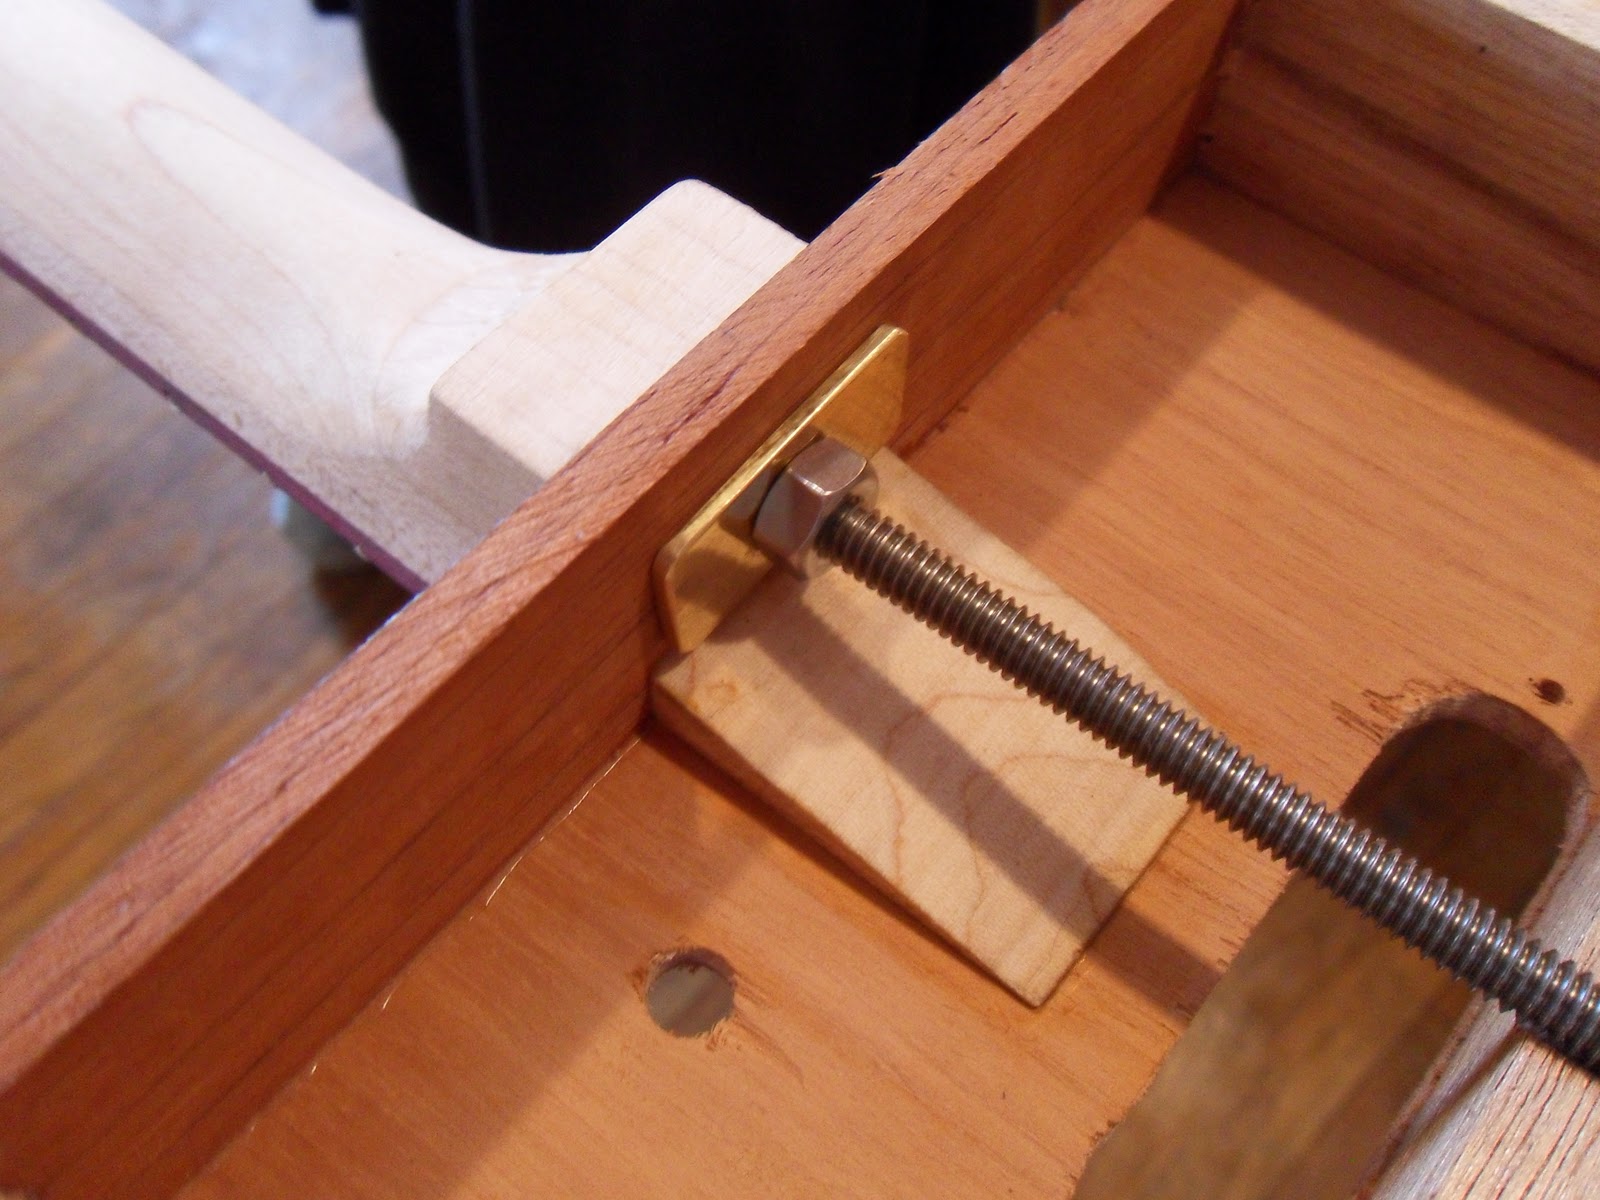
There will be a fretboard overhang of 1.5" and inside the box the neck will continue in and be glued to the underside of the lid. Plus we will add a heel and drill and tap it to accept a threaded rod that will be tightened against the heel trapping the front side of the box and continue through and ou the back to create a truss that will counteract string tension.
The piece inside will be tapered from the front inside toward the middle of the soundboard to allow maximum resonance with maximum strength. here are the markings for the cuts we need to make . we will be making these marks after we cut our headstock angles but i am showing them to you now so you can see what I'm talking about.

but lets back up and make all the pieces we need for this section starting with the headstock center piece. below are some headstock pieces freshly cut on the bandsaw. our headstock will be three pieces all are 1/2" thick. notice that this these were planed thinner than the neck blanks so thet they will work for the tuners we are using which are simple Stew-Mac open geared tuners that are excellent for the price.

our neck will measure 16.5" from the end of the fretboard ( front of nut) to the front of the box. so first we will mark our headstock angle on both pieces (neck blank and headstock center) , cut it on the bandsaw, and flatten it on our belt sander or joiner if you have one. Mark the pieces at any angle that will work for you. I use 20 degrees.


Not there yet. these angles need to be flat flat flat for a good strong fit.

Now that's much better. notice how tight our joint is. this takes a lot of finesse to do on a belt sander. Notice the reference line. This is not the line I marked in the picture above. sometimes you need to do this a few times, mark sand to the line, mark again, sand to the line and so on. this is why we do not mark for our cigar box until after this operation. I always seem to take off more than expected. also in the picture below I am only using this piece of wood to check the accuracy of the sanding, the wood will not be glued here as you will see below.

it is not as important to sand the neck angle perfect as it is the headstock angle. the angle cut onto the headstock is going to be where our joint is. The angle on the neck will be part of the top of the headstock as shown in the pic below. you can clearly see the four pieces of wood, neck, headstck center and two "ears"

before we glue our headstock on we will mark for our nut thickness of .215" plus a tiny bit of extra so in this case i made it an even 1/4" from the edge of the headstock angle. the we will mark the neck blank at 16'5" and finally make the markings for the box.


after we have made our cuts we are ready to cut our fretboard to length which is a total of 18" including our 1.5" overhang.


So I'm building a three string electric CBG. Don't know much about electric guitars, so I picked up a second-hand guitar for $30 (had access to an amp) and I've been fooling around for a couple of days with it. I still don't know much about it but I'm having fun!
As for the build, I'm sure I'll have a bunch of questions, especially on the wiring!
to me making a guitar or stringed instrument is an exercise in transferring and amplifying the vibration from the strings to the hollow box, in this case a cigar box. for starters if I'm gonna make the box resonate, it needs to be hollow. This means the neck needs to end at the box and then I need to brace the box minimally but in such a way that it will stand up to the string tension but be able to vibrate freely. I'm getting ahead of myself and we'll cover this later when we need to, so for now we will concentrate on building the neck.
I have built a few guittys and have come up with some standards for the necks I want to use. I have decided that I will be making four string guitars and have come up with a good string spacing of .350". Four strings allows me to have a playable neck width that doesn't need any truss rod which means less work for me and you. I have decided on a 24" fret scale simply because they play well and use less tension which means less neck deflection and frankly you need to start somewhere.
I will be using Hard maple for the neck and some purple heart for the fretboard. I purchased a piece of 1" by 7" hard maple from a local lumber supplier and the purple heart online. The purple heart was approx 1" by 7".
This post deals with ripping and planing the wood we need to get started. first I started by planing the hard maple from 1" down to .750". I planed it at first crown side up and then flipped it and ran it through until I got my desired thickness of .750". I use dial calipers for good measure.
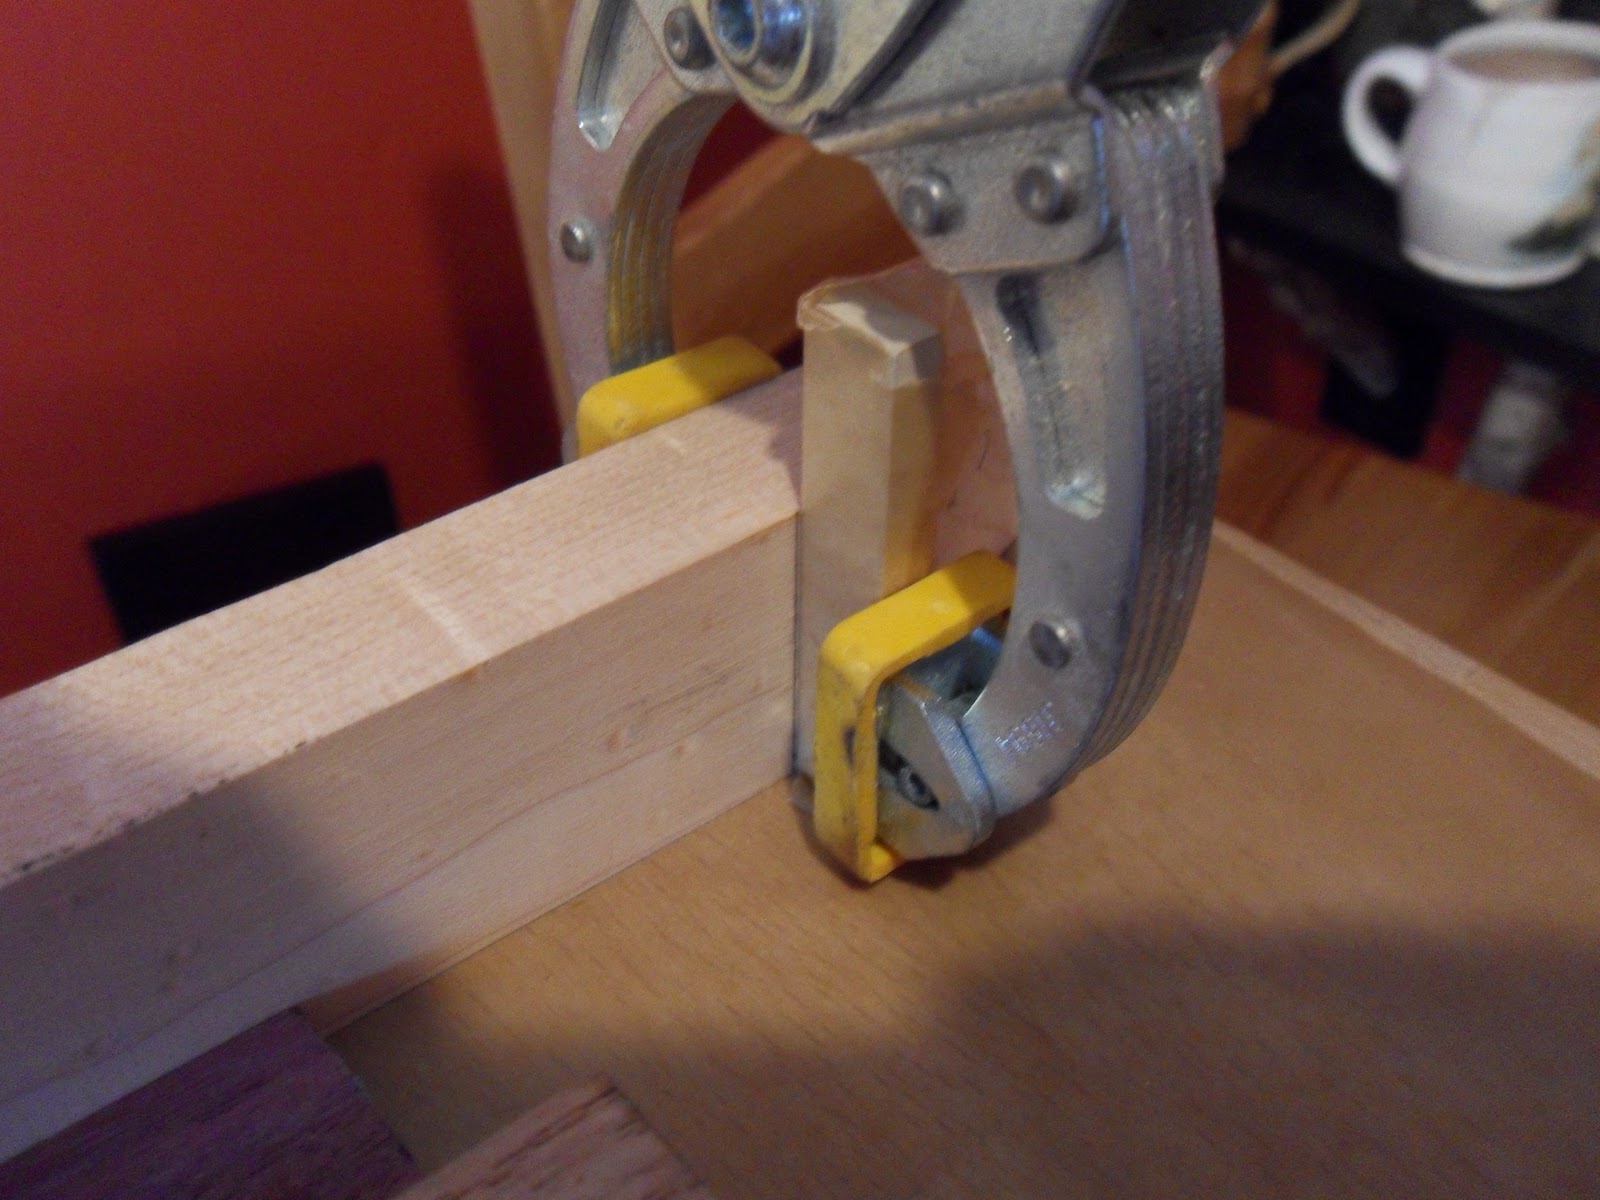
After I get the thickness I need I mark the boards to get four necks at a width of 1.5" which will be then planed down to 1.35" which is four strings @ .350" with .15 on either side to reach the side of the fretboard. I then set up my band saw and clamped on a quick guide using a speed square, two quick clamps and a ruler with decimal inch graduations to get the guide good and square and at the right measurement from the blade.


Now that I have my neck blanks I need to rip and plane the fretboard wood, so I mark and rip the purpleheart and then plane it to .250". You can make it thinner but I like .250" so there.


I also ripped some maple to the same width but planed it to .5" to make the headstock and ears that we'll get into later.
In these pics you'll see four neck blanks, two fretboard blanks, two headstock blanks that will be cut into 6" pieces, and a piece of cocobolo. I figure if I am going to make a neck I might as well make four.

It might be a good time to mention that when you plane your neck blanks, you need to leave extra room on the ends for the portion that gets screwed up in the planer. So find your length and add 6" if you have a similar planer.
before we glue the fretboard we need to make few cuts on the maple blank to accommodate the soundboard and then we're in business. we will cover that in the next post.
Hi all thought this may be of some use heres a link to a free fret calculator nice easy one to use
So, following my break/holiday it was back to work for a fortnight of difficult (and long) shifts.
However, I did manage to fit in a couple of open mic sessions. One was the monthly 'jam night' at the Plough where, having arrived late after a long shift, I played my cigar box fiddle performing (for those that know or care) "Lincolnshire Lads", "Fanny power" and and a tune of my own, "Gipple docks" Went O.K. although the people there were hardly expecting fiddle music.
On Thursday last, several members of the orchestra in which I play were attending a folk open mic session at the George hotel in Leadenham. As the place says it sells 600 different whiskies, the sessions are known as the 600 whiskies sessions. Very logical these locals.
As I had instruments with me I was asked if I wanted to play and, never one to
It all seemed to go down well with the obligatory discussions about the instruments and an invite to return another time and play some more.
Well I have been kinda in a state of suspended cbg building and playing this year.
Seems as though every time I get an Idea something comes up that is more important.
Back in April I rescued a baby raccoon and we have been raising him to be released this spring. He is like having a 2 year old again , into everything but he has been a fun and learning experience. I love nature and all of God's critters.
Then my wife's van had to have a new motor put in and now my lil mustang blowed the head gasket so it is always something but I will be messing with cbg's again cause it gets in your blood and sticks with ya!
Just some of my ramblings so see yall latter.
Besides CBGs, I have taken to buying el-cheapo plywood Les Paul Jr. copies on Craigslist and modding them up. They're easy to work on because the wiring's simple and they have a bolt-on neck. Here's one I got for $80 including the case:
First thing to do is properly route the pickup cavity for a full-size P90:
Here's the new rout shielded and ready for the new pickup:
Now to fit a cheap, no-name Bigsby and chrome pickup cover:
Strip and refinish the neck:
I used 10 coats of tung oil on this one, it makes for a really nice feel:
Clean out the neck pocket:
Rerout the control cavity and replace the junky Asian electronics with CTS and Switchcraft:
Re-dye the fretboard, replace the tuners with GFS tulips, new speed knobs, a new nut...
...and....
Voila - a smokin' little beater you can gig with:
Cheers, Brian
I think I'm going though a phase of workshop & tool obsession at the moment, having spent 3 days sorting my office/workshop and garage/workshop...and buying tools. I needed a new try square as my old one seemed slightly 'on the bonk' and ended up buying two, 6" and 9"..Sheffield made..a tenner for the pair! I've also ordered a new Record woodworking vice, as I've been bumbling along with an old engineer's vice and a workmate for ages. I've also just bought a digital 'vernier' gauge..absolutely brilliant for £11.70 incl P&P off eBay. It sounds bit over the top, but for measuring necks etc as I thickness them to size them its just so neat.
Next job is to fabricate a stand for my bench planer (just bought 100 feet of slotted angle for the job..a bit more than I needed, but a bit of Dexion always comes in handy..another eBay buy)..then fit braked castors to it and the thickness planer stand and I'm geared up for increased convenience and efficiency...well that's the theory. All this stuff is keeping me off actually making guitars, so I've been back on the case this afternoon....but I'm still looking for a bandsaw..and a table saw...and a bobbin sander...the list goes on.
This site is great. I just made my first 3 string fretless CBG and everything looks great. My question is that the string height seems awfully high 1/4". I am temporarily using a bolt and the nut and am using a plastic chop stick as the bridge. I would like to eventually use of these same chop sticks as the nut. The strings make a buzz when I press down on the string and attempt to play a chord. When I apply pressure on the string behind the nut (bolt) this buzz is reduced. Do I need to rebuild the head to reduce the height of the tuners to the bridge? Please advise.
Well everybody, I've just spent a week or so away at my parents and I suddenly realised how tired and fatigued I was. Dad got himself a cymera (or something like that) which is a trapezium shaped stringed instrument with each string tuned in a diatonic progression. It sounds really tuneful and would be great with a pick up and a bit of distortion.
I managed to post s pair of photographs of the biscuit tin guitar. A couple of people were kind enough to comment favourably on the solution I came up with in order to solve a bit of a problem with the bridge.
A full size photo of the "cruciform" bridge and of the guitar are
available on my page on this site.
I've been attempting to really learn the Lincolnshire folk tunes on fiddle as I have the opportunity to play for a few minutes at this Friday's (28th January) Plough Inn, Swinderby Jam night. I'd really like to have the chance to play my cigar box fiddle in public for the first time, It'll be a bit of a pox as I shall be working until 21:00 hours.
Since I got back from my holiday I have composed a couple of fiddle tunes and published the on TuxGuitar. This is a really good site as you can enter the tune note by note on a screen displayed fret board and the programme automatically prints out the music and the tab. To make sure that you've done it correctly it gives you, when wanted, a midi playback of the music you have inputted. You can also define the tuning of each individual string so slide tunings and alternative tunings can be chosen.
Not really cigar box business, but more of a networking thing. I have been asked if I would like to duet on the fiddle with another fiddle player at the Lincoln Drill hall in a few weeks. Hopefully I can somehow get a look in for a future cigar box opener/guest spot
If anyone wants to catch more of what I do, that never gets posted here,...please do go to youtube and search cinderellalifestyle . lots off vids, uke specials, national steel guitar,...nature walks and my rambles , which a basically
instrumental ditties put to pics, usually short and sweet...
if you want to look a vintage junque, or find my CD, that's here:
http://www.etsy.com/shop/lauriescustomthingz
bye for now!