All Posts (1994)

Sort by

So making nicely shaped necks isn't very hard. At least it isn't rocket science. First off, you have to want to shape your CBG neck in a nice rounded fashion BUT that is not a rule at all. No one says you have to round off any neck you make. If you want to then here is a very quick and easy way to make VERY nicely rounded necks that rival CNC machines or routers.


What you will need is a neck of some kind. Here in the US we get 1"x2" (3/4" x 1 1/2") wood slats or boards. Usually poplar or red oak from our home improvement stores. Get what you can and adjust accordingly.


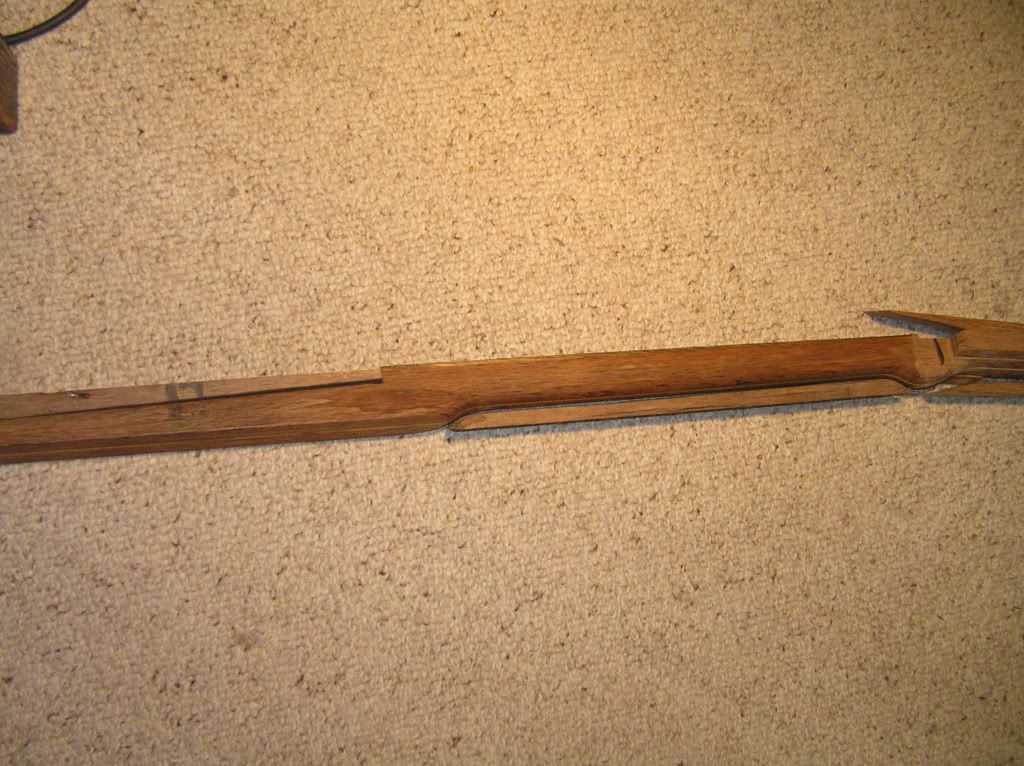
What you will see in the pics below is how I make my CBG necks. I do a laminated neck with (2) 1x2 slats that is cut down to 1x2 (sounds odd but you can see below what I am doing). For this illustration, I have not drawn the neck inside the box or how that is cut. As well, I do a scarf neck which is the angled end you will see. You don't have to to any of this but I do and I'm doing the illustrating :-)


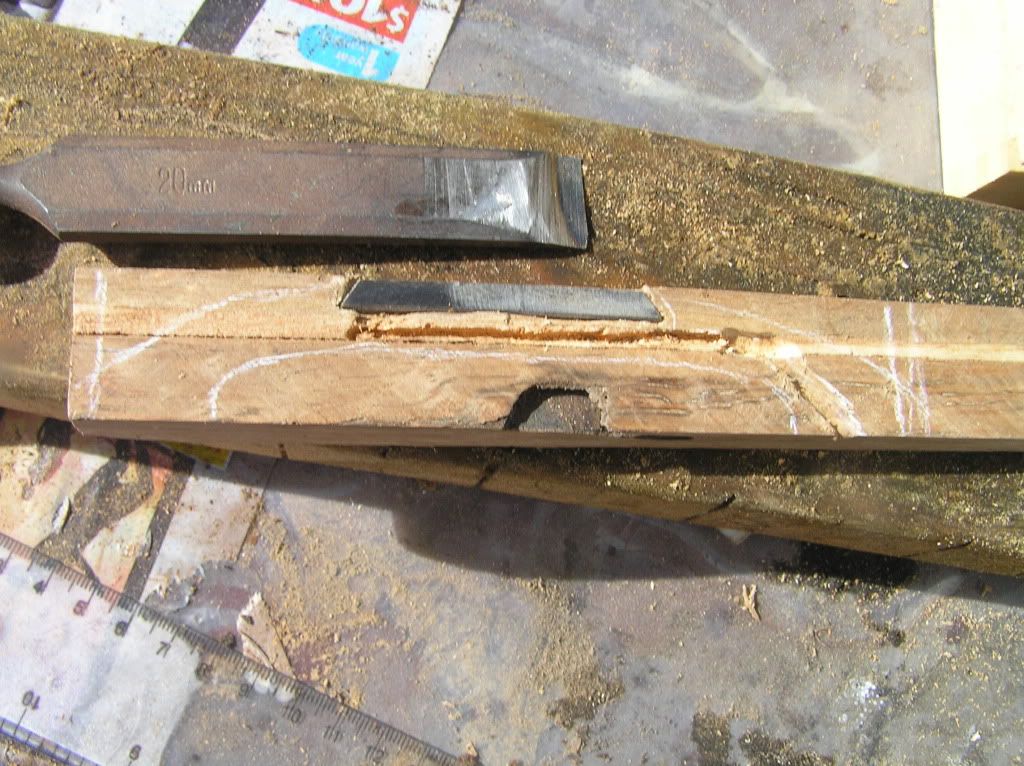
You will also need a plain flat spokeshave. I have a cheap one and regret it with every neck but it works. MAKE SURE IT IS SHARP! A dull spokeshave is not only dangerous, but does not cut well.


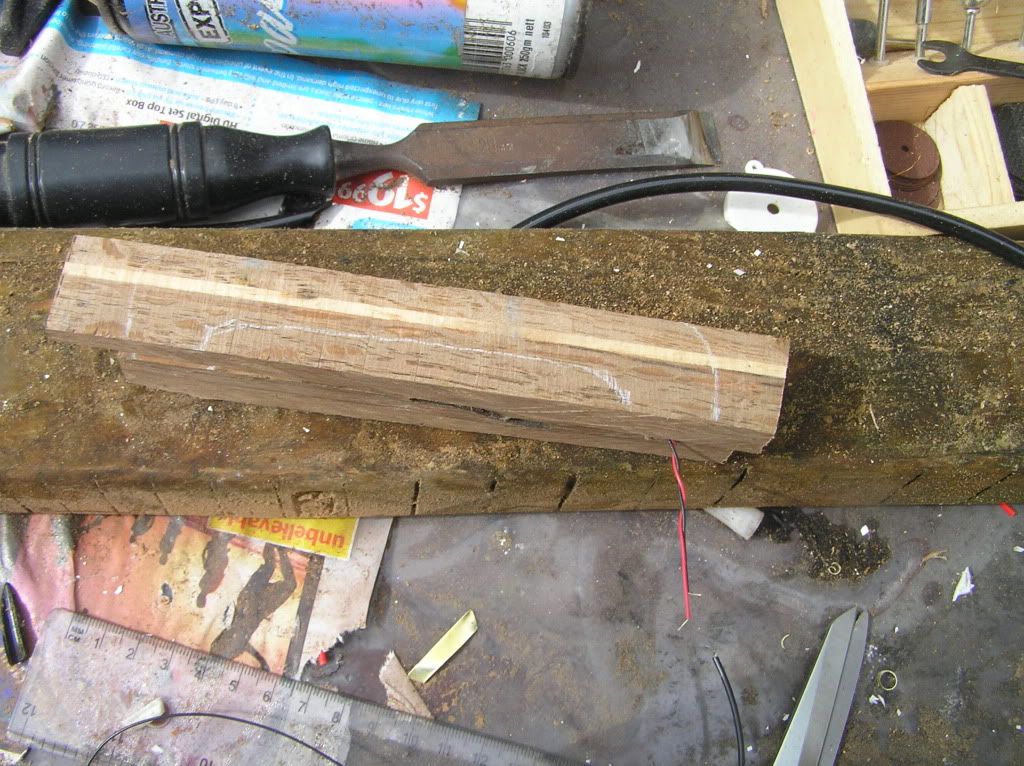
So the neck above is how it looks before I mark and cut. See the heel (not carved yet. I usually carve that first). Also see the angle at the right end. That is for the scarf headstock. Again, that is usually attached before I do the neck rounding.


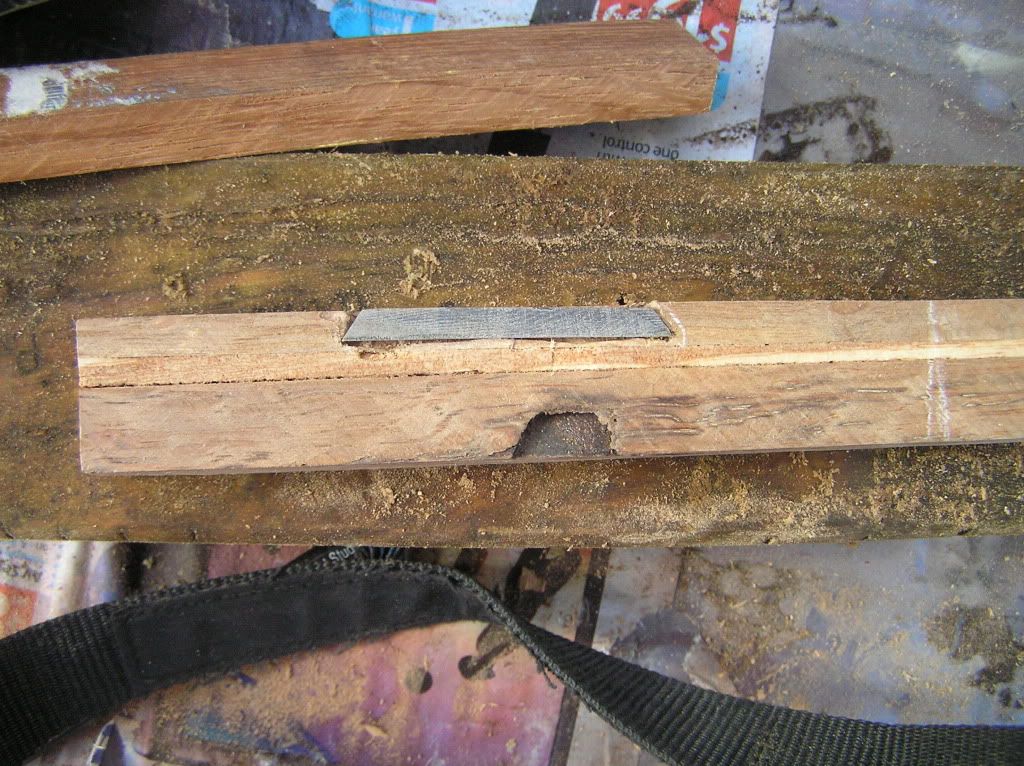
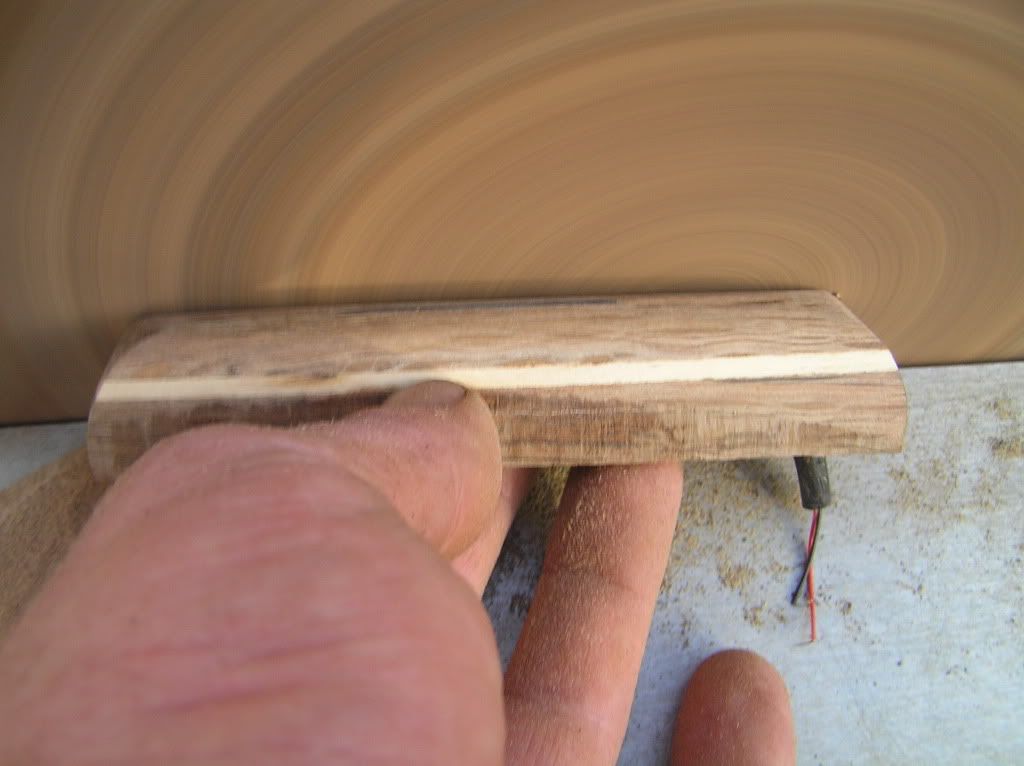
So to get the neck shape even, I'm going to use the spokeshave to 'facet' the neck as if it were 1/2 of an octagon. If shaved evenly will act as a guide to get the rest of the neck very even. I mark about 3/8" from the bottom corners into the bottom and side of the neck. I will make a pencil mark the length of the neck on those measurements which I will shave a flat area down to.


I also angle the ends in so that the neck and heel will transition well. See the areas in red. They will be the material removed with the spokeshave.


I clamp my neck down to a table (in my case I have a woodworking vise). Then I get to work with the spokeshave. Material comes off quickly but I don't want to take too much off too soon. I want the material cut evenly down to the lines. See how it looks like half of an octagon. Nice. This is what I want. You will also note that in this picture, I have drawn the marks for the heel shape.


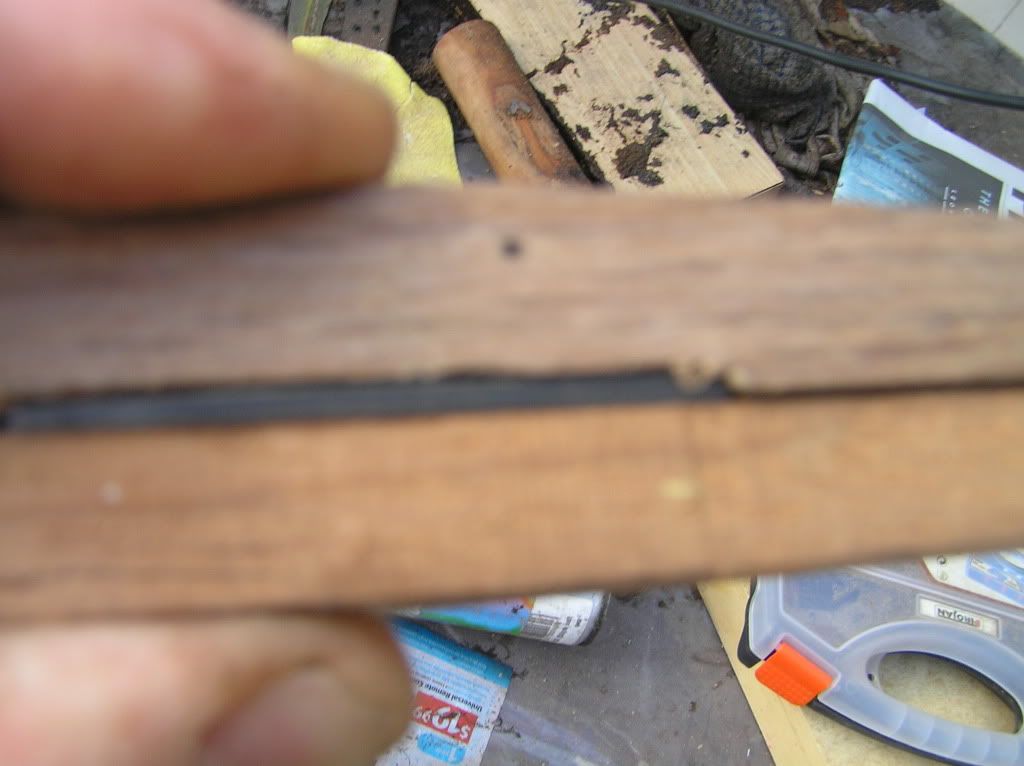
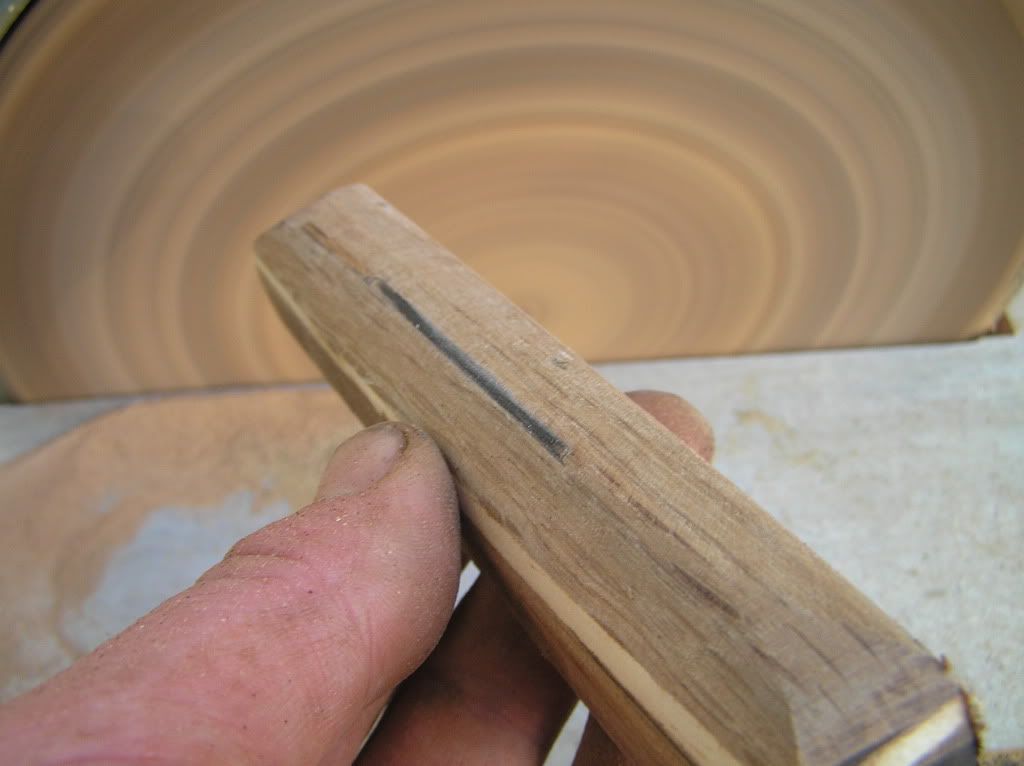
Once that is complete, I will use the spokeshave to further round out the 'facets' but will not allow the spokeshave to make the sides, bottom, or the original shaved area any thinner. I simply want to round the facets down.


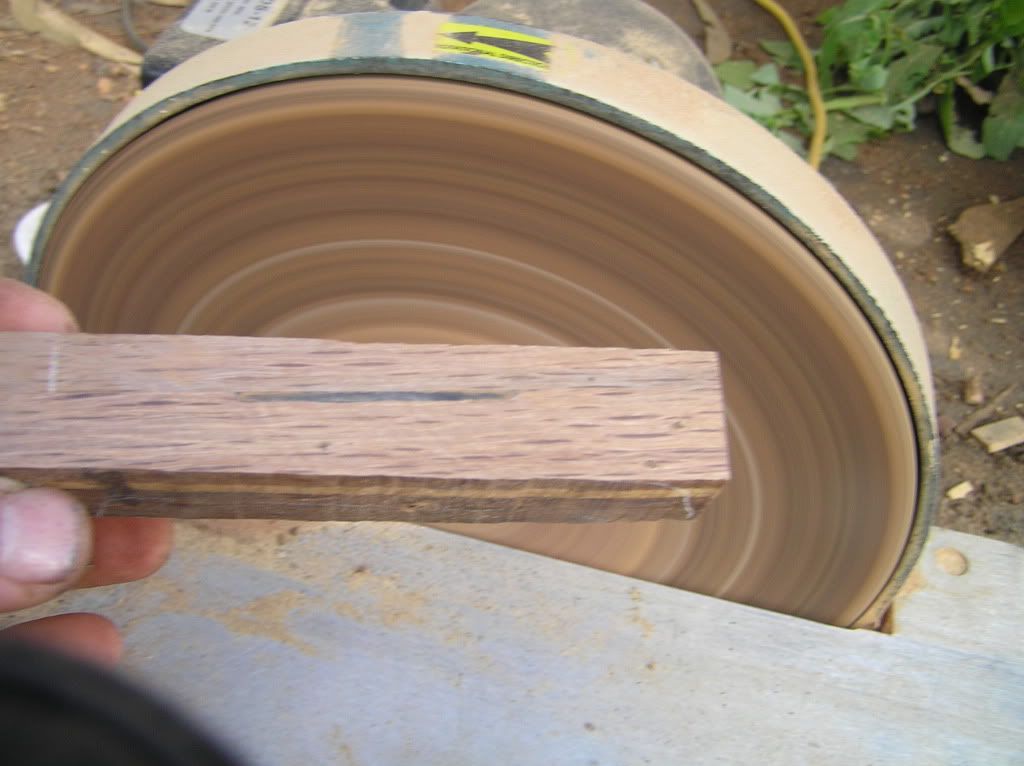
Once the neck is roughly round, I will take a wood rasp -- fine side only -- and continue to round out the neck. If you pay attention to what you are doing, the neck will come out VERY well.


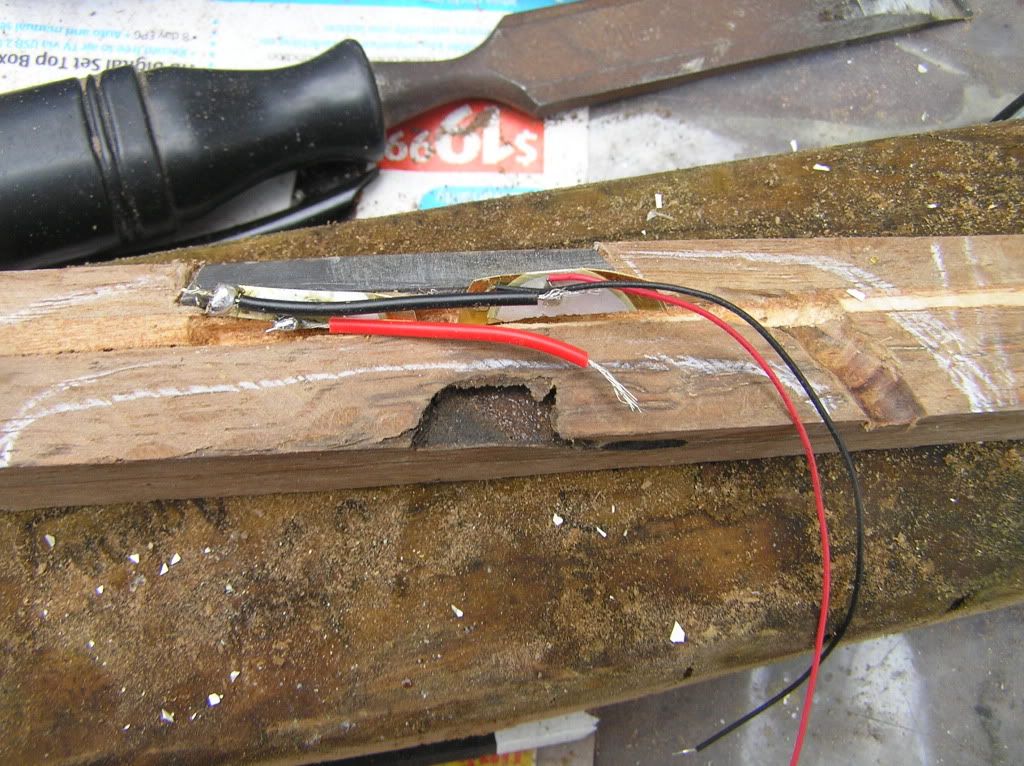
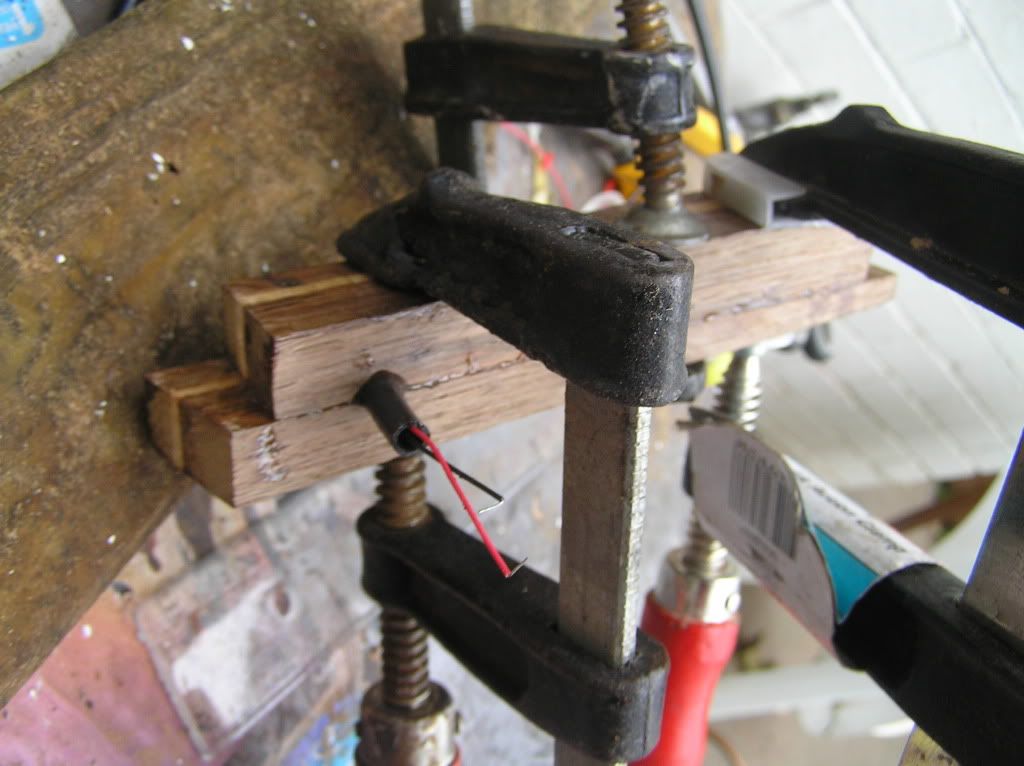
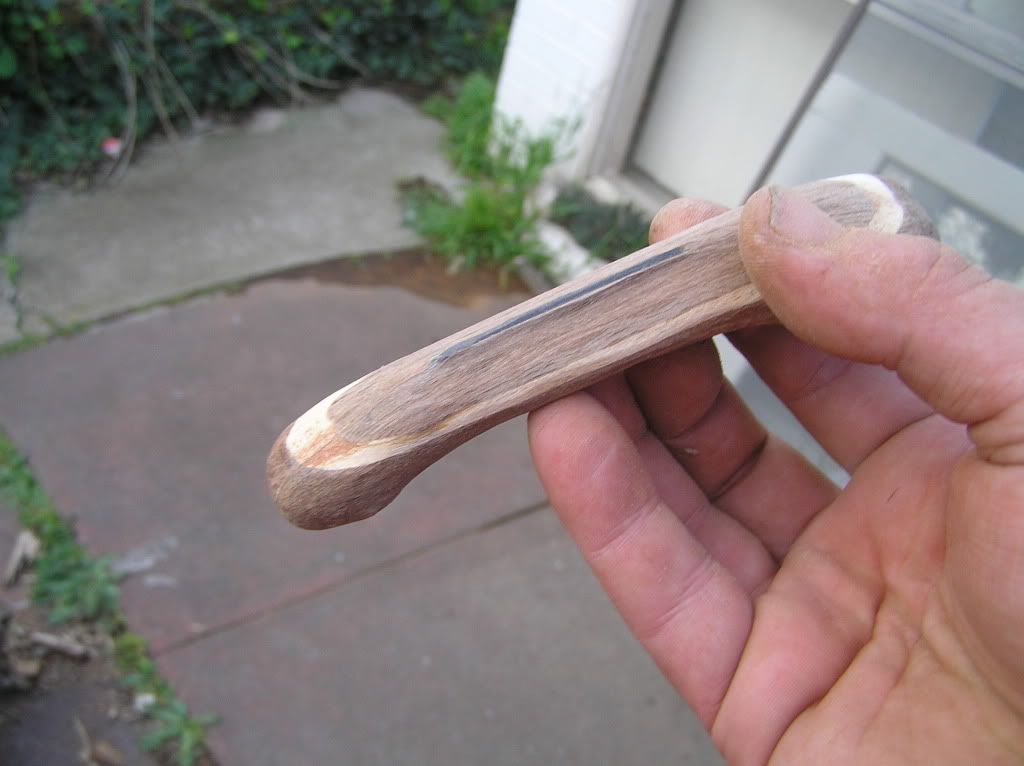
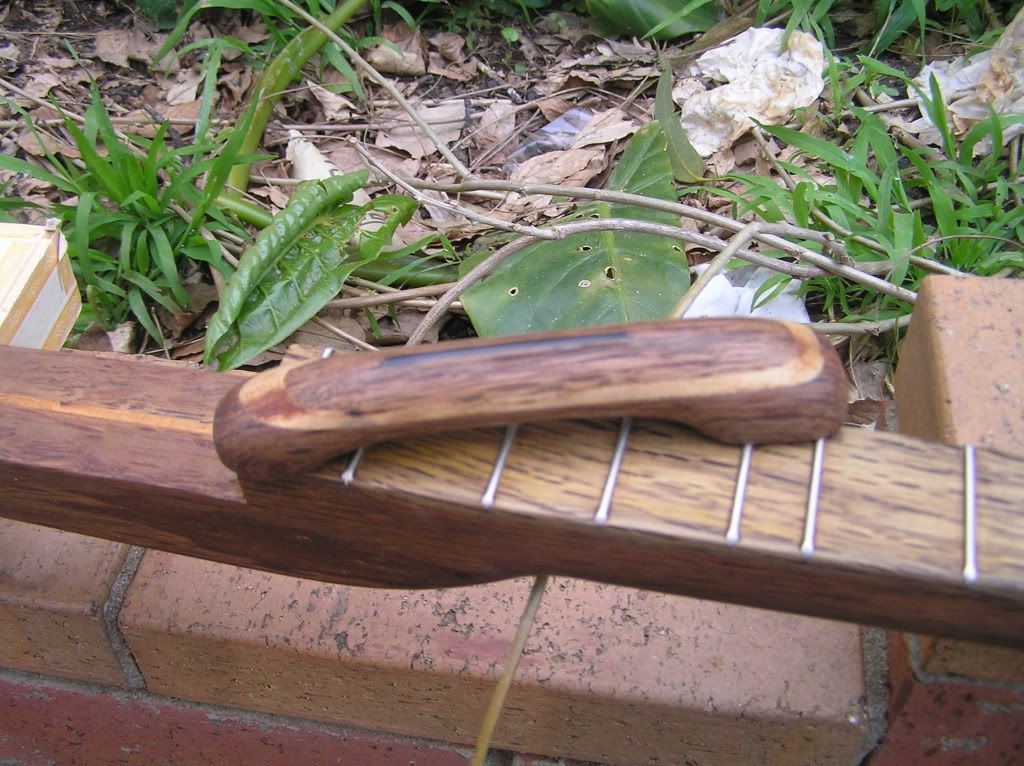
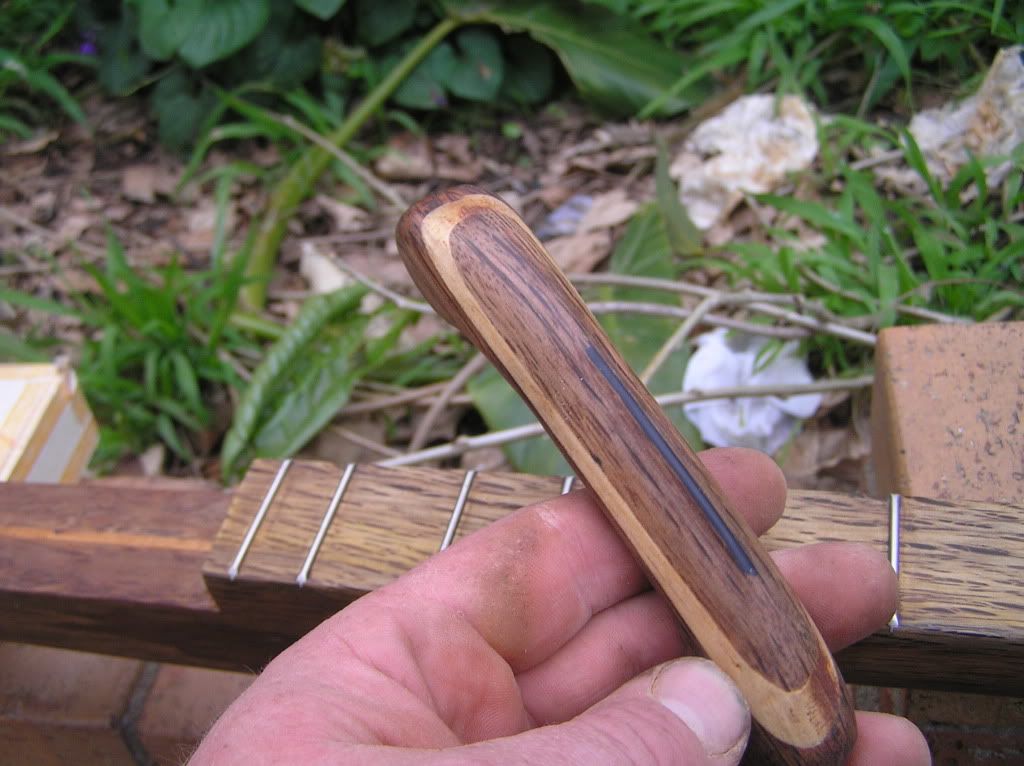
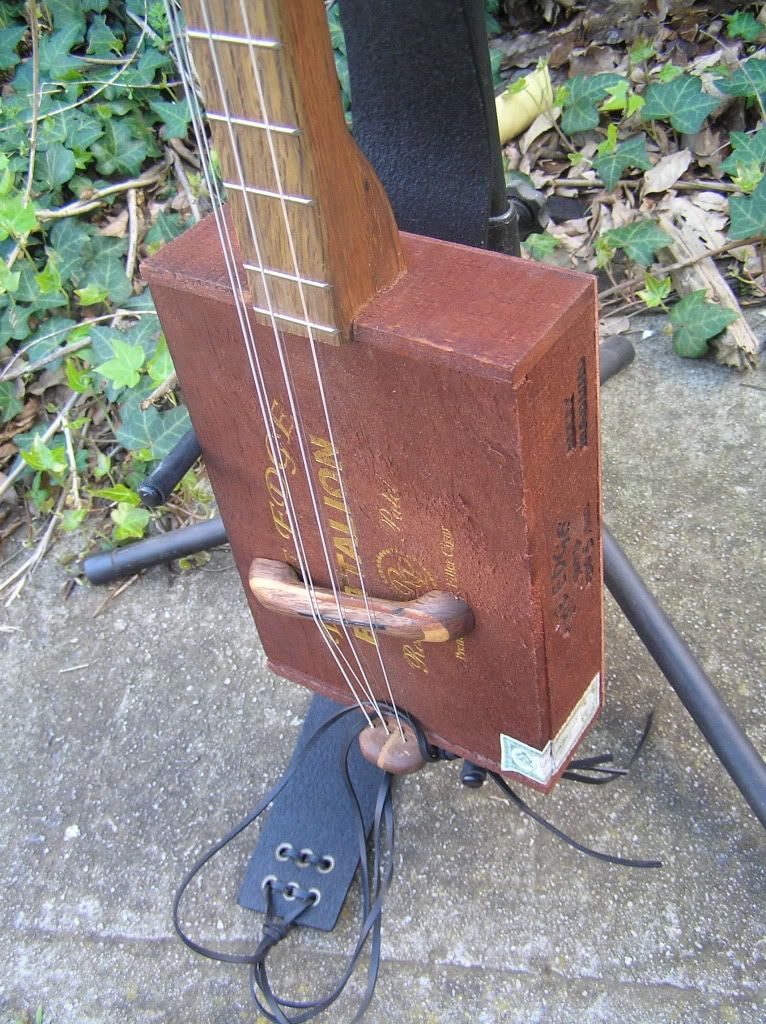
Here are some real pics


Good Luck


-WY

Read more…

About time I did something

So I have been thinking for a while that I really should do something with my music again. I used to love being in a band when I was young. And I got pretty good at it as well. Years of wheelchair use have left me with numb fingers so a CBG with a slide is ideal. I have always liked listening to blues and also have a background in Punk. So something along the lines of Seasick Steve, Hollowbelly and even Son Of Dave would be something I would like to try. Maybe an Akai Headrush peddle and a harmonica and a CBG. I am a bit disappointed with the resonator I bought from Big Daddy Mojo. There is no doubt it looks very cool. However the wayit plays is not what I expected for a guitar with a resonator cone. It is a primitive instrument so maybe I expected too much from it? Anyway, I am looking to get involved again. Maybe play so local veues? Who knows. Watch this space.
Read more…
Hi All,
I have built several cigar box instruments, but for the most part, they have been short neck with "through-the-body" attachment to the the cigar box. This simple method has a number of pluses, like not placing a lot of strain (from string tension) on the box and being pretty easy to implement. However, most of my cigar boxes are rather small, and I want to free up the space internally, so I'm trying to build CBGs with a bolt on (or screw on) neck. With this project, I am also adding a relatively long neck (25.75") to provide a 24" scale length. However, I have had some problems with this build with regard to bowing when I tighten up / tune the strings. But before getting to that, let me describe my build some more... First a photo:

9353728481?profile=original


The neck and head assembly which I used for this project was one I built this past summer and used on a 3-string cookie-tin canjo. But I decided not to bring the whole instrument back with me when I returned home to China, because I was carrying too much other CBG building supplies and related "goodies". So, I detached the can and packed this head/neck assembly along with two others, 12 cigar boxes, and a small supply of red oak and poplar (for building new necks in China) all in one large (and heavy) suitcase. Now I'm all settled at my new flat in China and have been itching to do a new build. So I decided to build a 3-stinger CBG with a 24" scale using this head neck assembly. By the way, this neck and head assembly is was built out of a 30" x 1.25" x 0.75" of pine and it features a straight head (no scarf joint). The head is slotted (4" x 0.5") with a 1x3 set of guitar tuners mounted on one side. The neck is also diatonically fretted using bailing wire. The neck also had no heel.

Next photo: The Neck to Cigar Box Attachment

9353727490?profile=original


Also, since the neck was not long enough to pierce both sides of my 9" long cigar box, I decided to screw-on the heck to one side of the cigar box. To do this, I first reinforced the neck side of the cigar box with a 5" x 1.5" x 3/4" piece of poplar; which I glued into the box, clamped down and let dry over night. Before gluing though, I cut a slot in this block of reinforcement wood (and through the side of the cigar box) to receive the end of the neck. This I secured into place the next day with three longish wood screws and additional wood glue. I also added a piece of wood perpendicular to the neck (and parallel to that piece of poplar wood) that I glues and screwed to form the bottom of the pocket containing the neck. For good measure, I sunk a screw up the length of the neck from this bottom piece. So, in all, I have six wood screws holding and wood glue holding this neck in place. I guess I'll have to draw a diagram to make this clearer. (See diagrams below.)

Anyway, it was looking nice and straight until I decided to add the strings and tune it up. Then I notice the neck bowing in relation to the cigar box such that the action (how far the strings are off the neck) was much higher than intended at the point where the neck meets the cigar box. If I release tension on the strings the neck will go back down and the strings will lay flatter.

So, to fix this problem, I cut out a triangular piece of poplar wood about 4.5" by 5" by 1.25" and 0.75" thick to use as a "heel" on the base of the neck. As my original design had no heel, so I thought the easiest way to fix the problem was to add a heel. So, I clamped down my instrument with the fret-side down, using another long stick of wood and 2 clamps to hold the cigar box tightly down to the table and this eliminated the bow in the neck. I then pre-drilled three holes for 3 different length wood screws and then screwed the heel into place (i.e. heel to neck), and then I used a 4th screw which I was sank diagonally through the heel into the cigar box and the block of poplar wood which supports the side from behind. It's this 4th screw that prevents most of the bowing. When I un-clamped the instrument, the neck was pretty flatly lined up with the cigar box, which was my intention. When I tightened up and re-tuned the strings, there was much less bowing, although there was a little. The bowing is not so bad, so I think I'll let this prototype cigar box guitar "pass", at least for now. Now to play it to see how it sounds.

Here are some diagrams to illustrate how I went about attaching the neck to the cigar box body:


Photo 3: Showing the neck bracing (heal).

9353729279?profile=original


It's pretty much self explanatory. If you have questions, just add to this post.

In the meantime, I need to research how to do a cleaner head/neck-to-cigar box attachment. I might even sacrifice another cigar box and recycle this same head / neck assembly to do it with if I can make it work and look better. Right now, my heel fix is quite ugly.


-Rand


Read more…

Piezo Preamp Experiment

Today I assembled my first preamp based on a MFP-102 FET using a circuit design I got from the Internet (see URLs listed below) and components I bought from Radio Shack last summer. It buffers a pair of Radio Shack piezo pickups to drive a 15 Amp guitar amplifier I have. It worked first time, but the two piezo pickups are very sensitive in spite of wrapping them in foam. I will be experimenting on how to make the piezo pickups less sensitive and where to best locate them on my CBGs. Here is the circuit design I used with all Radio Shack components:

Here's a photo of my "test" circuitry:


Here are 3 URLs related to the circuit design above:
http://www.rason.org/Projects/jfetamp/jfetamp.htm
http://www.hawestv.com/amp_projects/fet_preamp/fetpreamp1.htm
http://www.hawestv.com/amp_projects/fet_preamp/fetpreamp2.htm#schematic

I have also put together a Radio Shack parts list with current prices. Radio Shack has been slowly downsizing the components selection that they offer over the years, so hopefully they still have all the parts when you get around to building this circuit. You can check by going to the Radio Shack website (google: "Radio Shack" + "components"). Here's that parts list:

I'm told the specs for these FETs vary widely and that you should buy several in case the first couple are out of spec for this application. For out of spec FETs, you can still use them if you change the values for R2 and R3, but that whole topic is way beyond the scope of this posting. If you are new to FETs and the MPF102, you need to be sure to know which lead is which. Here's an image file that shows which lead is which for the MPF102:

Maybe this is a better picture:


If I had a working digital camera, I would take a photo and post it, but my solder side of the PCB makes me feel ashamed (it's so messy - workmanship-wise). I think I need to invest in one of those soldering "third-hand" helpers with the two movable alligator clips and magnifying glass to help see what I'm doing. A photo of the component side along with how the battery is connected would be good to have. Also a second photo of how I temporarily connected the circuit board and components inside my CBG would be helpful. So, I'll see what I can do to come up with a digital camera.

As the purpose of the preamp is to strengthen the signal from the piezo pickups so that you can use a long cable between the CBG and the guitar amp, I shortened the two leads on the piezo pickups (to minimize signal degradation); but I did so perhaps a bit too much, as it is difficult to reposition the pickups in different places on the back of the soundboard and have the preamp circuit in the middle. As I have it rigged right now, the two pickups are mounted on the neck inside the box with the preamp board between them. The 9V transistor radio battery is velcroed to the bottom back side of the cigar box. After the thin foam failed to minimize sensitivity, I added thick foam, and find that that seems to isolate it too much such that I barely get any gain out of my guitar amp (but no fingering noise). So, next time, I'll try wrapping it in 2 layers of thin foam. If that fails, I'll try hot glue, but that will make the installation permanent, so I'll likely hold off on that as long as possible.

Additional experiments will be to use this circuit on different instruments I've built to see how well it works with canjos as well as other CBG configurations. That's why I'd like to keep the circuit "portable". It will take some practice to see how I can get a good "electric sound" out of these instruments. Well, that's all for now.

-Rand


Read more…

Li'l Stogie Amps & Guitars

Just a little bit about me, several years ago I was diagnosed with dimentia,because of this I had to retire from my regular job Heavy Equipment Opperator. I also work as the Entertainment Director at a Casino's Showroom. Being a long time Musician myself I nedded to find something to do with myself since everything I had was taken from me because of this. As just another guitar slinger chaseing his sound I stumbled across Shane's site, and ever since then I have found my outlet and fouce for me. I enjoy the people on this site thier idea's and concepts of building they are truely an inspuration to me and others thank you so much one and all, you have given back my pride and self estem. RockDaBluz Johnnie Li'l Stogie Amps & Guitars
Read more…
The Budrows will have a song played on the Radio on SUN FM 91.3 in Sonoma, CA. on Saturday the 18th. There will also be an instrumental from fellow cigar box guitarist Shane Speal, both songs will be in the second half hour of the show. The show will also feature new releases from Robert Plant, TheSteeldrivers, and some of the winners at the Americana Music Awardslast weekend.
Check it out online at http://sonomasunfm.com/ click 'listen now' at the top of the page. The show is from 5pm to 7pm pacific time.

Keep on strummin' and download our FREE 8 song demo at www.soundboxguitars.com

Jason, (The Budrows)
Read more…

A welcome

Hiya to all on this great Nation of builders. I'm Rene Verberne (it sounds less disgusting in Dutch) and I recently built a CBG... in the past I did some small projects in making instruments out of scrapmaterial (olive oil cans, computercasing, first aid kits, etc), mainly ukuleles. This is to blame on my friendly neighbors who embrased me into The Ukebox. So swing round my website or the Ukebox (which is in Dutch, so for somewhat similar postings check our the leading lady's webpage...

Not even too hard to find on FaceBook and what not
Read more…
I wanted to make something really special when I built my 6 string out of the Arturo Fuente King Bee box and overall I think I did. Below is a quick diagram of how I wired it up. Note that the humbuckers need to have the ability to be split. I show 4 wires but actuall there are 5. One is a shielding ground. The wires you need to be concerned with are North Start, North Finish, South Start, South Finish. The switches need to be single pole double throw on-off-on. Some are NOT on-off-on. Be aware of that.

Contrary to common sense, I had to make the tone controls ahead of the volume and any 'blender' pots. I used a .022 uf tone cap from Radio Shack. YMMV. I did use two good sets of pots -- each rated for tone or volume and I tested the resistance first to make sure they matched OR which were which.

Most of all the ground either was common or put specific to a point on the chassis. I didn't really care how or where the pickup grounds were but the pot and the bridge/string/shielding grounds went directly to the (-) of the jack to more or less make the quickest path to ground.

The greatest challenge was figuring out which damn wire what which on the pickups as they didn't have a single piece of documentation. I had to figure it all out based on which set of poles created a current (volt meter helped) and which was N and S (I used a compass, heh). From there it was easy. The pups did have N and B on them so that helped.

Also note that I did have to swap the 1 and 3 leads on the blender later but can't remember why.


I followed this basic diagram from Seymour Duncan:


Best of Luck!

Here is a PDF:
AF6string.pdf
Read more…

from the streets to the symphony hall..

Get up 5:30am and satnav my way north toward Birmingham for the largest UK arts festival.I pray it doesn't rain cos my rusty car roof leaks and I dont want my gear getting wet! Arrive at Chickenbone Johns' 1960's bohemian split level gaff nice n early.After a quick coffee we convoy into the city centre and set up the cigar box nation stall.It's another example of just why Chickenbone John is the Godfather of the UK cbg movement-with the stall emblazoned with cigarbox nation backdrops, his homemade cbg's and flyers.I set up my gear.Over the next 6 hours, we alternate doing short sets to the passing festival goers,selling cd's and handing out flyers for the 2nd UK CBG fest next month.

Its a long time since I played on the street and I'm reminded how different it is to playing to an indoor captive audience.I find it harder to build a relationship with the mercurial masses-they do stand and watch, but stop playing for more than 4 seconds and the crowd will soon dissipate as the river of people flows,naturally enough, along to the next stall.You have to be more aggressive in the way you interact, pulling them in and keeping them there.I see John working the crowds doing just that.I unfortunately do the opposite and give up trying to talk to them and simply resort to playing the tunes.I'm still harbouring secret doubts about my abilities-due largely to not having had the type of positive feedback that only comes from a live audience for a few months.Playing in amongst a line of stalls doesn't particularly assail my demons.After I overhear the nth person hissing Seasick steve to their partner I seriously consider having a shave.On the other hand, as John sagely points out-its really the only point of reference the public has to what they are witnessing on the stall.

Around 5 we break down the gear and dash across the city to load for the gig at the CBSO. (City of Birmingham Symphony orchestra)Damn-this place is one serious venue.We are directed through massive manned steel security gates.Not the usual parking down a dark alley behind the club.There are staff on hand to help in any way they can-its all very pro.Me and the Godfather load via the stagedoor, down a corridor lined with huge double bass cases-the effect is funereal, they stand like gleaming white Sarcophagus against the wall.We pass the Ancient Egyptian sentinals and enter the concert hall-holy smoke-the ceiling is like 3 stories high and its all polished wood floor.I throw down my grotty carpet and set up-it looks tiny but kinda cool-the addition of the cd flightcase left open toward the audience makes it look like a set-the final addition of a bottle of beer and I'm good to go-I like the way it looks and I'm learning fast about selling.The soundcheck is painless-the acoustics are the best I've experienced (but they would be given its home to an orchestra!) I dont even have monitors, yet I can hear everything.Fantastic.It might sound pretentious but I feel at home.

So I'm on at 6:15pm-opening act for an evening of blues.I think to myself "who the hells gonna turn up for a gig at this hour" but I'm wrong-the place fills-the Godfather grabs a radio mic and tells the crowd about next months festival and introduces me-I cross the expanse of polished wood and strap meself in. "its dead posh ere innit?" I say and they all laugh.I tell them I can always tell posh venues cos the toilets still have the plastic seat bit attached to the loo.More laughter.Launch into Jolene and it all goes gr8.Its so good to feel that ebb and flow between the audience and the performer-its like being psychic-you can feel what they're feeling, tell what they're thinking-gauge their level of enjoyment.This is what I like.Theres no bull-its immediate,its all out in the open.I tell them if 3 of them buy my cd I'll be able to get enough petrol to get home.Its over all too fast but the reaction is gr8 and a good number of people line up and buy the cd.It's exactly what I need and the doubt demons flee to bother someone else for a while.So thanks to Chickenbone John for providing me with the opportunity to get back in the driving seat.It felt good.Oh yes.

Read more…

Our friend Robin Rogers needs our prayers...

This sad news was in my email this morning regarding the health of Blues great, Robin Rogers. Robin is always very nice to me and always willing to sign guitars or pose for pictures. I was fortunate enough to spend some time with her in Memphis this past May for the Blues Music Awards. She is very talented and kind hearted. Please keep her in your prayers.

This sad news comes from Steve Hecht at Piedmont Talent. Robin Rogers who has been in the hospital over the last 2 weeks with a severe liver condition. This condition was diagnosed as an inoperable cancerous tumor in her liver. She is currently at home surrounded by her family and receiving hospice care. Over the last few years she has risen to prominence in the blues world, and has a new release on the Blind Pig label due out on Sept 14th. Prior to her hospitalization, she was doing extensive touring with Debbie Davies. Her humble and sincere personality, coupled with her unmistakable talent, made us all take her in and as an adopted little sister. So this news will surely come as a shock wave to the blues community. For more information about Robin from the Piedmont Talent website click here. We love you Robin.

Shane

Read more…

An archtop piezo bridge method for u to try


This is how i been making my last three or four bridges..
it maybe useful for u if u got a bit of a neck angle and some height in there.. Ur all very welcome to use, improve etc on my ideas

my recent experiments indicate that a taller bridge gives me more volume, and spreading the feet further apart seems to as well..

P10100018.jpg

1.. ok so here we have a typical neck for me, and with the four main bits of scrap that i bandsaw off.. we are looking at the wedge shaped one on the left of the pic. Incidentally, i always save the other big one, from underside of the neck, cos i reckon if i wanted to make a case, thatd just about be a perfect supporter for the neck... but i never did one yet..


2.. I take a straight edge to my neck and work out roughly how tall my bridge is gonna be, then i trim down that bit of scrap..
i mark it out into two halves, and find the centre of the thicker half to set my saddle into..
this saddle is buffalo horn (i cut 3 from a nut given to me from Glenn Reither), but i've previously done bone ones and may do brass or steel or whatever just as easily.
Note i am working on the top of the neck scrap, the side which is known to be square.. the other side has ugly bandsaw marks... (this is important)
Don't worry about that ugly hole near the bottom, that'll be scooped out later

P10100035.jpg

3.. So i chisel out a slot for the saddle so it can be recessed to its full depth inside the wood

P10100047.jpg

4. ok, so around the saddle i measure and mark out my rough bridge outline, then i cut out a slot under for the piezo, and a way out for the cable thru one of the bridges legs. I prefer to go down the leg on the treble (floor) side, bcos i think its a little easier to work out where to drill the hole in the box lid

P10100055.jpg

5. i cut a piezo disc into a couple of thin strips and solder the cable to them. I do em in parallel, so I piggyback one onto the back of the other, black to black and red to red..

P1010007.jpg

6.. i cut the other half of the plank off, pop it on top, and copy my rough outline onto there

(I flip it over, like closing a book, so the two square sides are the join, and the outsides are the rough, bandsawn edges..)

P1010009.jpg

7.. i cut a small 2" length of gardening irragation hose, its probly about 8mm hose.. I put this to cover the cables for two reasons; it makes it much easier if u need to shave a few mm off the feet, protecting the cables, and it also provides some protection for the cables from ur box or tin lid later when u poke it thru..

I open it out again, spread and and fill all the cavities right up with 5 minute epoxy, then i push it all together again and clamp it tight.P1010010.jpg

now this is (what i think) is the really clever part... the angle we started with on this bit of scrap compounds on itself, making a scarf joint !! yep, we have a new square edge, and now the saddle is set in on a bit of an angle.. its not exactly the angle we want of course, so the bridge wont go in exactly square, but its close..


8.. 3 or so hours later, when Im comfortable to pull it out of the clamps, first thing i'll do is hit the linisher and find my saddle on the top

13.jpg

9. then i'll start rounding over the top, note because of the diagonal position of the saddle this is kind of an elliptical motion im rounding it to (so two of the corners get rounded off more than the other two and the end result is a regular rectangular bridge, but with its feet twisted to something of an angle..)

14.jpg

which may be easier to understand from this next pic..

15.jpg

10. the linisher wont handle the inside edges of course, so eventually we gotta pull out the pretend spindle sander and go to work on the inside. A bandsaw would really help here, but i only have a little toy one; I only use it for bone and little jobs, and i only have access to the big ones on wednesdays and Thursdays at my wood club

18.jpg

11. after another 5 or 6 minutes i need a smaller one....

20.jpg

here u can see i use the little drum sander to 'walk' the saddle out a little..

(i dont actually do it one handed of course, the other is holding the camera here.. )


12. then theres maybe half hour of sanding by hand, i spend most of my time on 60 grit, then just a few minutes each on 100, 240, 600, and 1200

21.jpg

13.. I sure like that Tung oil stuff eh ??

22.jpg

23.jpg

Well, thanks for having a look & I hope its of some use to you, please put a pic up or give me feedback if u try it..

Another idea i want to try on it soon is a metal saddle (or a laminated saddle of more than one component, one of which is a metal) with a wire to its underside for earthing a mag pup to easily..

P1010007-1.jpg

Read more…

Thanks

At last, some free time to say thanks to everyone in York Pa. I have been to a few fests in my life but this was by far the most energetic, original and all around blast I've ever attended. We spent the 16 hr drive home listening to ten new cd's, some three times and talking music figuring who we can drag along next year. We decided we need a van. Thanks again and see you next year. Mike and Tony from Il.
Read more…

STRINGS FOR CBG- HELP

Does anyone have a recommendation for the types of strings for a 4 string electric CBG?

In open G tuning( GDgB)...would you go with wound G&D & plain g & B? If so, what gauge?

I just installed wound 4 ( .032)...Wound 3 ( .024), plain 2( .016) & plain 1 ( .115)...sounds very electric, but not twangy....

You're suggestions are welcome

Read more…

Howdy y'all

Just joined your nation. I'm building my first CBG and will be in York tomorrow to get some tips, meet some folks and of course listen to some fine music.
Read more…

I'm Always The Last One

I'm sure everybody and thier brother has seen the "OOKS of Hazzard" do the Kids (MGMT cover). So It just goes to show there is something happening right now, a new movement in music that is starting to sweep across this country, and I really feel that by building and playing a roots instrument, I am a part of it. I feel it in my heart, body and soul, and I think all of us in this community feel it too. It is indescribable, and while I don't have a big name or recordings or anything other than a little box and a neck with strings that I made from my own two hands, I know the feeling that comes when I play it.

So here's a link to a random blog I ran across while on break featuring that video and a little background information behind it.

http://www.nodepression.com/profiles/blogs/the-ooks-of-hazzard-going-from

Read more…

Honeydripper (Movie)

I'm no critic of films, but have to comment on the movie Honeydripper. The setting and period costumes were spot on for the era, but talk about SLOW! The dialog was just about killing me,

Glover had to carry so much of the movie's lack of momentum, with the exception of Keb Mo' who I kept thinking of being some sort of "Crossroads" reference character.

Just wish he would have ripped, on that National, just for 30 seconds.

The other star of the show was that Electric guitar. The design and sound was perfect for the movie! Sheer genius of Ted Crocker.

Read more…