All Posts (1994)

Sort by

You can hear the album HERE

All songs ©℗bemuzic 2017

Cigar box guitars made by me were used on every song.
I also made most of the drums and percussion instruments, plus some Native American Flutes. (On trk 2, one made from some garden cane is used, and on trk 6, one made from black bamboo)

The only bought instruments are a cheap old children's glockenspiel, a harmonica, an Irish Whistle (on Winter Song) a djembe, and a cajon.

Song inspirations include, one of my favourite authors - Haruki Murakami, the amazing photographer - Sebastião Salgado, and Naomi Klein (The final track was written after reading her book Capitalism VS The Climate)

 Any feedback good or bad (though try and keep it constructive!) welcome...

Read more…

Pickup Winder from a Cordless Drill

A while back, I asked for opinions of a coil winder in this thread:

http://www.cigarboxnation.com/forum/topics/opinions-on-this-coil-winder-please

In that thread I decided just to make my own from a cordless drill that was given to me years ago. Well, I finished it today.

9353909668?profile=originalHere are the donor parts I used from a 14v Black & Decker drill:

9353910276?profile=originalNote the flat spot in the white nylon on the gearbox. This allowed me to create a stock (or pillory if you prefer) out of MDF to act as a mount for the gearbox:

I attached a piece of 2x3 to act as a mount for the motor. There is a small piece of 1/8" hardboard to bring the motor level with the gearbox.

9353911067?profile=original9353911499?profile=originalThe little metal bit you see is to take up some slop the gearbox had in the mount.

Now that I had a mount, I glued this to some 1/2" MDF to act as a foundation, added walls and a roof out of scrap MDF and 1/8" hardboard and then glued in little strips of cypress for "deadwood nailers" to grab screws.

9353912654?profile=originalI used a larger piece of 3/4" MDF to make a portable work station to mount the motor housing, the wind counter sensor and a wire guide. I painted this white so that I would have a good contrast to the dark wire. These old eyes need all the help they can get.

The parts I had to purchase were:

* 5 Digit LCD Digital Punch Counter from China on eBay for $9.39: http://www.ebay.com/itm/LCD-Punch-Counter-Digital-5-Digit-Including-Proximity-Switch-Strong-Magnetic/181770167673?ssPageName=STRK%3AMEBIDX%3AIT&_trksid=p2060353.m2749.l2649

* PWM Motor Speed Controller from a US eBay seller for $5.29: http://www.ebay.com/itm/DC-6V-28V-3A-PWM-Motor-Speed-Variable-Regulator-Controller-Switch/292157244044?ssPageName=STRK%3AMEBIDX%3AIT&_trksid=p2060353.m2749.l2649

* 10" long 1/4" dia. stainless steel rod from a US eBay seller for $5.77: http://www.ebay.com/itm/1-4-Diameter-304-Stainless-Steel-Round-Rod-10-Length-Extruded-0-25-in-Dia/371988172942?ssPageName=STRK%3AMEBIDX%3AIT&_trksid=p2060353.m2749.l2649

* 2 1/4" stainless steel stop collars from a US eBay seller for $4.99: http://www.ebay.com/itm/2-1-4-SHAFT-SOLID-STAINLESS-STEEL-SET-SCREW-COLLAR-STOP-SSC25/291904232285?ssPageName=STRK%3AMEBIDX%3AIT&_trksid=p2060353.m2749.l2649

I already had a DPDT ON-ON mini toggle switch that I had purchased from Tayda Electronics that go for $0.85: http://www.taydaelectronics.com/electromechanical/switches-key-pad/toggle-switch/mini-toggle-switch-dpdt-on-on.html

as well as a 2.1mm DC Power Jack for $0.13 from Tayda: http://www.taydaelectronics.com/dc-power-jack-2-1mm-enclosed-frame-with-switch.html

So, I have $26.42 into this minus the MDF, hardboard and screws.

I also made a pickup bobbin mount from a 2" screw and a 1/4" x 1-1/2" aluminum bar stock I had but that can be made from wood as the aluminum bar stock is fairly expensive.

The power supply I picked up at Goodwill. I don't remember what I payed but it was cheap. It is only 12v, 1 amp so the motor doesn't turn full speed but it turns plenty fast for me.

Here.s a shot after I finished soldering everything up:

9353913254?profile=originalAfter I buttoned it all up and tested it, I at first thought that the counter wasn't counting. But, it was counting just fine, it was just that the LCD display on the counter doesn't have a very large viewing angle. So, instead of making a new front panel that would raise the display up to a 10" height, I simply put a 2x3 "leg" on the front edge. This proved to be more ideal anyway as I have a better viewing angle while using the winder.

Read more…

Dan Sleeps Memorial

For anyone who is interested in attending Dan Sleeps service, it will be on August 5,2017 at 10:00am and will be at Fairfax Community Church 11451 Braddock Road,Fairfax VA will be followed by a luncheon at 9624 Masey McQuire Ct. Lorton VA.

Read more…

Mini Vacuum Former Experiment

I've been working on making a pickup winder based on a cordless drill and so far, so good. But I have come to a stand still on that waiting on parts and according to tracking, I won't have them until Monday July 24.

To fill the time gap, I came up with a related project. I was thinking "what am I going to use for pickup covers?". This lead me to DIY low suction vacuum forming machines and after reading a few articals and watching a few YouTubes, I came up with my own design.

I decided to make mine very small. Why? Well, first of all, I am not going to be making stage props, just small simple parts. But also, Being retired and on a fixed income, economics played a more important roll. You see, the plastic used in vacuum forming costs on average about $5 for a 12" x 12" x .040" thick piece.

My mini vacuum former has a platen of 5" x 5" and a frame that holds a 6" x 6" piece of plastic. $1.25 mistakes are a lot more palatable than $5 mistakes on an 11" x 11" platen.

The platten base is made from 3/8" x 2-1/2" radiata pine. This was meant for a short scale bass box guitar but...

I just used butt joints - glued and screwed. The top of the platen is some scrap pegboard I had but I drilled 4mm holes in between the existing holes.

On one side of the platen, I used a 1-1/4" hole saw to accept the hose from my little Hang-Up shop vac. Unfortunately, the actual hole it makes is 1-3/8" dia. so, to solve this, I could have just wrapped some duct tape around the end of the vac hose but, I found that a plastic medicine vial was perfect for making an adapter - which I epoxyed in.

Around the platen bass I attached some 3/4" x 1/2" poplar scrap I had and put 3/4" x 1/4" foam weather stripping for the bottom frame half to meet and keep flush with the platen top.

Unseen in the photos is a 4-1/4" x 4-1/4" piece of 1/4" MDF glued in to make a bottom for the platen.

The frame halves are also made from radiata pine. I ripped the pine down the center to give me (roughly) 3/8" x 1-1/4" strips and made the top frame half with all four sides of this dimension. The bottom frame half has two parallel sides 3/8" x 1-1/4" and two parallel sides 3/8" x 2-1/2", this is to accommodate the guide post dowels.

The frame openings are 5-1/16" square so nothing binds up. I rubbed paraffin on the dowels so the frame slides up and down smoothly.

I spent about $10 on the hardware:

1 - 4 pack of 1-1/2" x 1-1/2 corner braces
1 - 4 pack of 2-1/2" x 2-1/2 corner braces (these larger ones were over kill)
8 - 1" long bolts
8 - wing nuts
5/8" dowel (under a dollar for 3' @ Walmart)

I used a scrap piece of 3/4" MDF to mount everything on.

Enough talk, here are the pictures:

9353905653?profile=original9353906058?profile=original9353906655?profile=originalI did make a test run, it was a fail but encouraging. The plastic I used was not meant for vacuum forming, I think it is an opaque defuser for fluorescent light panels. I thought it may be useful for pickguard material but it is very brittle and chips too easy. It's about 1/16" thick.

When I heated it with a heat gun, it never did sag like the plastic in the videos despite heating it for 3-4 min. but it did look like it was going to blast a hole through it so I just went for it and pushed it down over the "mold". Since it wasn't forming around the mold very tightly, I continued using the heat gun but it just wasn't going to turn out as hoped.

9353907478?profile=originalI am fairly confident if I use the proper type plastic that is a little thinner, this little thing could work well for my needs but I do think I'm going to add some more holes in the platen top.

Read more…

Pocket hole neck attachment

These photos show the neck of my uke project after attachment using pocket holes. The double holes on the top will be covered by the fretboard; the bottom one, filled with a maple plug, will be visible. The neck is rock solid, screwed through the box into a maple block. But it's not reversible ... We're past the point of no return here. 

The fretboard is glued on and curing tonight; all that remains is the saddle, and then the adjustments. 

9353903088?profile=original

9353904089?profile=original

Read more…

Progress: Cigar box uke with shaped-edged box

I used a core box router bit and the table saw to shape this neck to match the tricky Ashton cigar box. I can elaborate if there is interest. I'm very pleased with the joint. 9353901662?profile=original

Now that the neck has been shaped, I'll be attaching it with pocket screws through a maple glue block two through the top (to be hidden by the fretboard) and one from the bottom, to be covered with a maple plug. The box will be permanently sealed at that point ... no going back!9353902253?profile=original

9353902701?profile=original

Read more…

Licence Plate Box Build

I'm thinking about doing a licence plate git and have been looking at various posts here there and everywhere and have noticed that almost all of the boxes that get built are rather thick.  Just wondering if there is a reason for this, as I have some really nice 1/2 inch Birch plywood that I got from my boss, and was considering using that to make the back and sides.  But as I said all I see are really thick boxes. So what do you guys think?
And I know......... "There are no rules" ....but we all know that sometimes there are.

Read more…

Pro Tip - Floating Blade Bridge Action

 Anyone that has followed my builds or seen my instruments will know that I'm a huge fan of "floating blade" style bridges combined with a "Zero-Fret" string guide/nut. I have found this combo to be one of the most consistent ways to achieve low string action. I'm going to now share with you one of my secrets to how I make my floating bridge the correct height.

I use a simple wedge feeler gauge. I locate where the bridge will sit on the soundboard, and slide the feeler gauge under the string. I then check the action and adjust the gauge until I have the action that I want. I mark that height on the gauge with a pencil. I then take the gauge to my bridge material and mark that height. I then draw out my bridge design, cut and finish.

I hope this little tip will help you.

9353898680?profile=original9353899656?profile=original9353899896?profile=original9353900487?profile=original 

Read more…
Well i guess i've hit what can only be described as "builders block" (very similar to writers block).Had a productive day making the neck and headstock for my #2 build only to spend the last 6 hours trying to decide on the rest of the design! I think ive picked the box to use, but so many ideas running through my head i cant make my mind up... Electric or acoustic? Fretted or not? Which tailpiece and bridge? Which tuners? Which sound hole covers? Aaaargh!!!!
Read more…
I am building my own CBG and would like to use it for slide and chording. I am a total newbie when it comes to stuff like this. Can a slide generally be used with a fretted neck or should a slide only be used without frets? It looks like most videos show using a slide on a fretless neck...I am used to playing a slide on an electric guitar with the action set a tad higher. I can still play chords on it but I don't know how that would "translate" into playing a CBG. Thanks!
Read more…

First attempt at a guitar (part 2)

After cutting the outside, this is what the body looks like (upside down):

9353895484?profile=original

The neck is made of quarter sawn maple with red arariba glued in the middle.  I decided on 'neck almost through' building technique, and have about a 2 degree back angle on the neck.  While I have not started this yet, I plan on using wenge for the fretboard, tailpiece, and bridge.

9353895886?profile=original

9353896488?profile=original

The book matched sound board was cut from a carefully selected spruce 2x6 which was pretty close to being quarter sawn and had no knots in the section I cared about.

9353896675?profile=original

Yesterday I cut the f holes and planned the bracing, and bent the binding wood (red arariba) which I will be using for binding the f holes:

9353897659?profile=original

9353898071?profile=original

9353898655?profile=original

More posts to follow as I progress.  If anyone has any suggestions or comments, I am happy to hear them... while I have a fair bit of woodworking experience, I don't have a lot of experience with guitars.  This site has been a great resource when I was in the planning stages, though... I could not have gone this far without the great content here!

Read more…

First attempt at a guitar (part 1)

After my drums and ukulele, I decided to try for a more CBG-esque instrument.  (Unfortunately, no cigar boxes were harmed in the making of this instrument).

This guitar uses CBG design principles, such as through neck, floating bridge, 4 strings, no truss rod, etc.  However instead of a cigar box (which I don't have ready access to), I decided to make my own box.  Since I am a sucker for punishment, I decided to make it in the traditional figure 8 shape... but without using any wood bending techniques.

First things first, I drew up the design in QCAD.  I took elements from various CBGs I have seen online:

9353890657?profile=original

Drawing on the skills I had learned in my drum construction, I then planned and cut segments at the proper angles to fit together for the body:

9353891097?profile=original

Glueing this together turned out to be very difficult due to the weird angles involved, but eventually I got it working:

9353891491?profile=original

9353892266?profile=original

9353892478?profile=original9353893874?profile=original

You will note that one edge is not glued yet.  I used this to get the band saw inside, and cut the inside to shape.  I then glued the last edge, and glued on the back:

9353894491?profile=original

This turned out very well (and greatly exceeded my expectations).

(More posts and pictures to follow... I can't seem to add more pictures to this post)

Read more…

First stringed instrument build (Ukulele)

Hi all,

My work with stringed instruments began a few months ago with a ukulele build.  Not a cigar box, but a custom box nonetheless.

9353884499?profile=original

Maple neck and soundboard, walnut sides and back, red arariba bridge and fretboard, deer antler nut and saddle.

I did this one before I was familiar with CBG style building, so I made quite a few mistakes, but even then it turned out alright.

Pictures:

9353884893?profile=original

9353885482?profile=original

9353887072?profile=original

9353887659?profile=original

9353888466?profile=original

9353889076?profile=original

9353890073?profile=original

Read more…
  • GLASTONBURY 2017

    After last year's success selling cigar box guitars at Glastonbury, we decided to have another shot at it. My sales manager (and daughter) Anne completed the application in October of last year...and early in March we heard that we'd been offered a place. We accepted it, although there was a fair bit of email ping-pong to sort out the exact size of the pitch, as we'd been moved across the other side of the trackway from last year, and we needed to finalise how much space we needed for the marquee, van and tent. It still looked like a good pitch...between the two biggest stages, the Pyramid and the Other Stage, right in the middle of the action with plenty of footfall. As my younger daughter Liz was in Tokyo, I needed to call in a 3rd team member, so who better to help sell cigar box guitars than Hollowbelly? With that all agreed, we set to with a will, ordering in stock and components, planning what items  we needed to carry more of, new lines to stock and so forth. Having been there before really helped, as it meant that we could focus on making stuff that we knew would have a good chance of selling strongly.

    New stock ready for Glastonbury

    As well as making guitars there's a whole load of stuff to be done before trading at a major festival - submitting our public liability and employers insurances, preparing health and safely  plans, fire prevention checklist, getting the van serviced, MOT'd, ordering staff clothing, getting all our electrical gear PAT tested, ordering the on site power supply...all this in addition to running our online shop day to day.

    As the day drew ever nearer, it looked like it might there might be a chance of a fair weather festival, and indeed when we set out on the Monday morning it was HOT! We'd arranged to meet Hollowbelly about 40 minutes drive away from Glastonbury, so we picked him up in a lay-by on the A39, crammed his gear into the back of the van, said a fond farewell to his wife and family and made our way towards our destination.

    Turning off the main road we drove along some winding country lanes and then started encountering the various ticket and security checks. Once we were on the metal trackways that run like a spiders web all across the site we knew we were well and truly getting closer. This year security was much stricter than before - we had to get out of the van and open it up for inspection twice (with loads of stuff falling out as we lifted the tailgate and having to be re-packed). They also inspected the cab of the van, and took great interest in a cigar box that I has stowed in a door pocket, although it only contained spare bulbs. We got our vehicle pass issued, the number of passengers was written on the windscreen, photo IDs checked, health and safety notes read out to us, and tickets inspected three times before they finally ripped off the counterfoils.  The massively high steel fencing, huge and strange looking industrial vehicles shuttling about and dozens of staff wearing dust masks added to the strangely distopian feel to the process of getting on site. Once we'd driven past Worthy Farm itself we dropped down Muddy Lane (this year it was bone dry and dusty) and the panorama of Glastonbury revealed itself, with the Pyramid Stage  and the Tor visible through the trees and hedges as we drove down towards the central markets and arenas. We were held for a few minutes as the marshalls radioed ahead to confirm we would be arriving at our pitch. This time we knew where to head, and Anne navigated us accurately along our route, past weird and wonderful constructions, sculptures, stages, bars and traders emporiums being established and fitted out. We found our pitch quite quickly, dropped off the van and headed to the market office to check in and get our wristbands - a friendly and efficient process and we were all now officially on site and ready to get set up.

    It  took us a few minutes to figure out exactly where we were supposed to put the marquee, as we'd been given a quite bit more space than I'd expected, but we managed to figure it out, and I had a quick word with the neighbouring trader. The marquee went up first, then the tent and finally I shuffled the van into place. I walked back to the office to ask about when we'd get our electric hook-up, but we were told that we could plug in ourselves, so we returned, found the correct cables (no regular 3-pin plugs here, you need the industrial 16 or 32 amp connectors). All powered up, we were ready to set up the stall, which meant unloading the whole van so that we could unload the big plywood sheets that were in the back of the van. These would form our floor that we would be working off, then the tables could be set up, and the sign and banner bolted together and hoisted into place.

    Back of House and all set up.

    At Glastonbury this passes for 3 Star accommodation compared with what the ordinary festival goers have to contend with.  Nobody camped on your doorstep, space to put out a table and chairs and a cooker, our van right next to us, private water supply, our own electricity and loos (composting, not flush), totally fenced-in and gated with 24 hour security staff.

    We cooked dinner and had an early night, ready to set up the shop properly on Tuesday, in readiness for the arrival of the public in Wednesday. The next day dawned sunny and hot...way too hot to work, in the 30s before noon, so we took it very slowly, drinking plenty of water as we went. Early in the afternoon Dermot and Dawn, old friends from Birmingham  turned up to see us. They work every year as volunteers, and we spent a couple of hours chatting and trying to find some shade...this was a fortunate interruption, as it was still really hot when we got back to work at about 2.30pm. By early evening we were all ready to go, set up, everything on display and price tagged. Lighting, PA and amps plugged in and tested, electronic card readers charged and checked.

    We went for a stroll , going past the Other Stage and then wandering along the service road which runs through the wholesale markets area - you really get to see the working of this festival from such a viewpoint. We ended up on the main backstage trucking route, and it felt that we shouldn't be there, but with the Traders passes it seemed we weren't going to get into any trouble, we were just directed by marshalls to a pedestrian route which brought us through the interstage area at the back of the main Pyramid stage. Even backstage the camping facilities for the roadies and tech crews looked pretty grim - hundreds of tents and vans and trucks  really packed together, right next to the loos...living the dream.

    The Pyramid stage before it all kicked off. Even at this late stage, we were surprised that they were still building up the sound system and excavators were trenching out for  installing underground cabling.

    Wednesday we were up early, breakfast prepared and another hot day in prospect. We had visits from the market manager, recycling people and the fire officer...so by 10.00am we were ready to trade.

    First official day, ready to go.


    Within the hour we'd made our first sale, to a TV personality no less, Martin Roberts of Homes under the Hammer and I'm a Celebrity.

    We traded steadily on Wednesday, and on Thursday fortunately  the weather cooled a little and we had a very good day, exceeding last years sales figures by a good margin - things were looking good.

    Friday was another good day's trading. Hollowbelly was pulling a bigger crowd than the official open mic bar just a couple of hundred of metres away. I think what people liked was the spontanteity and being able to get right up close to a live performance, which is difficult to do at any of the proper stages at the festival. We also did some inpromptu dueting, riffing on John Lee Hooker's "Boogie Chillun" and Status Quo's "Sweet Caroline", both of which seemed to go down very well with the crowd. Every time after these short demo sets, the marquee would get packed with people, and these folk weren't just coming to look, they were buying. We offered a "Guitar Creche" lay-away service, and the van was filling up with guitars that people had bought and would collect later that day or at the end of the festival.
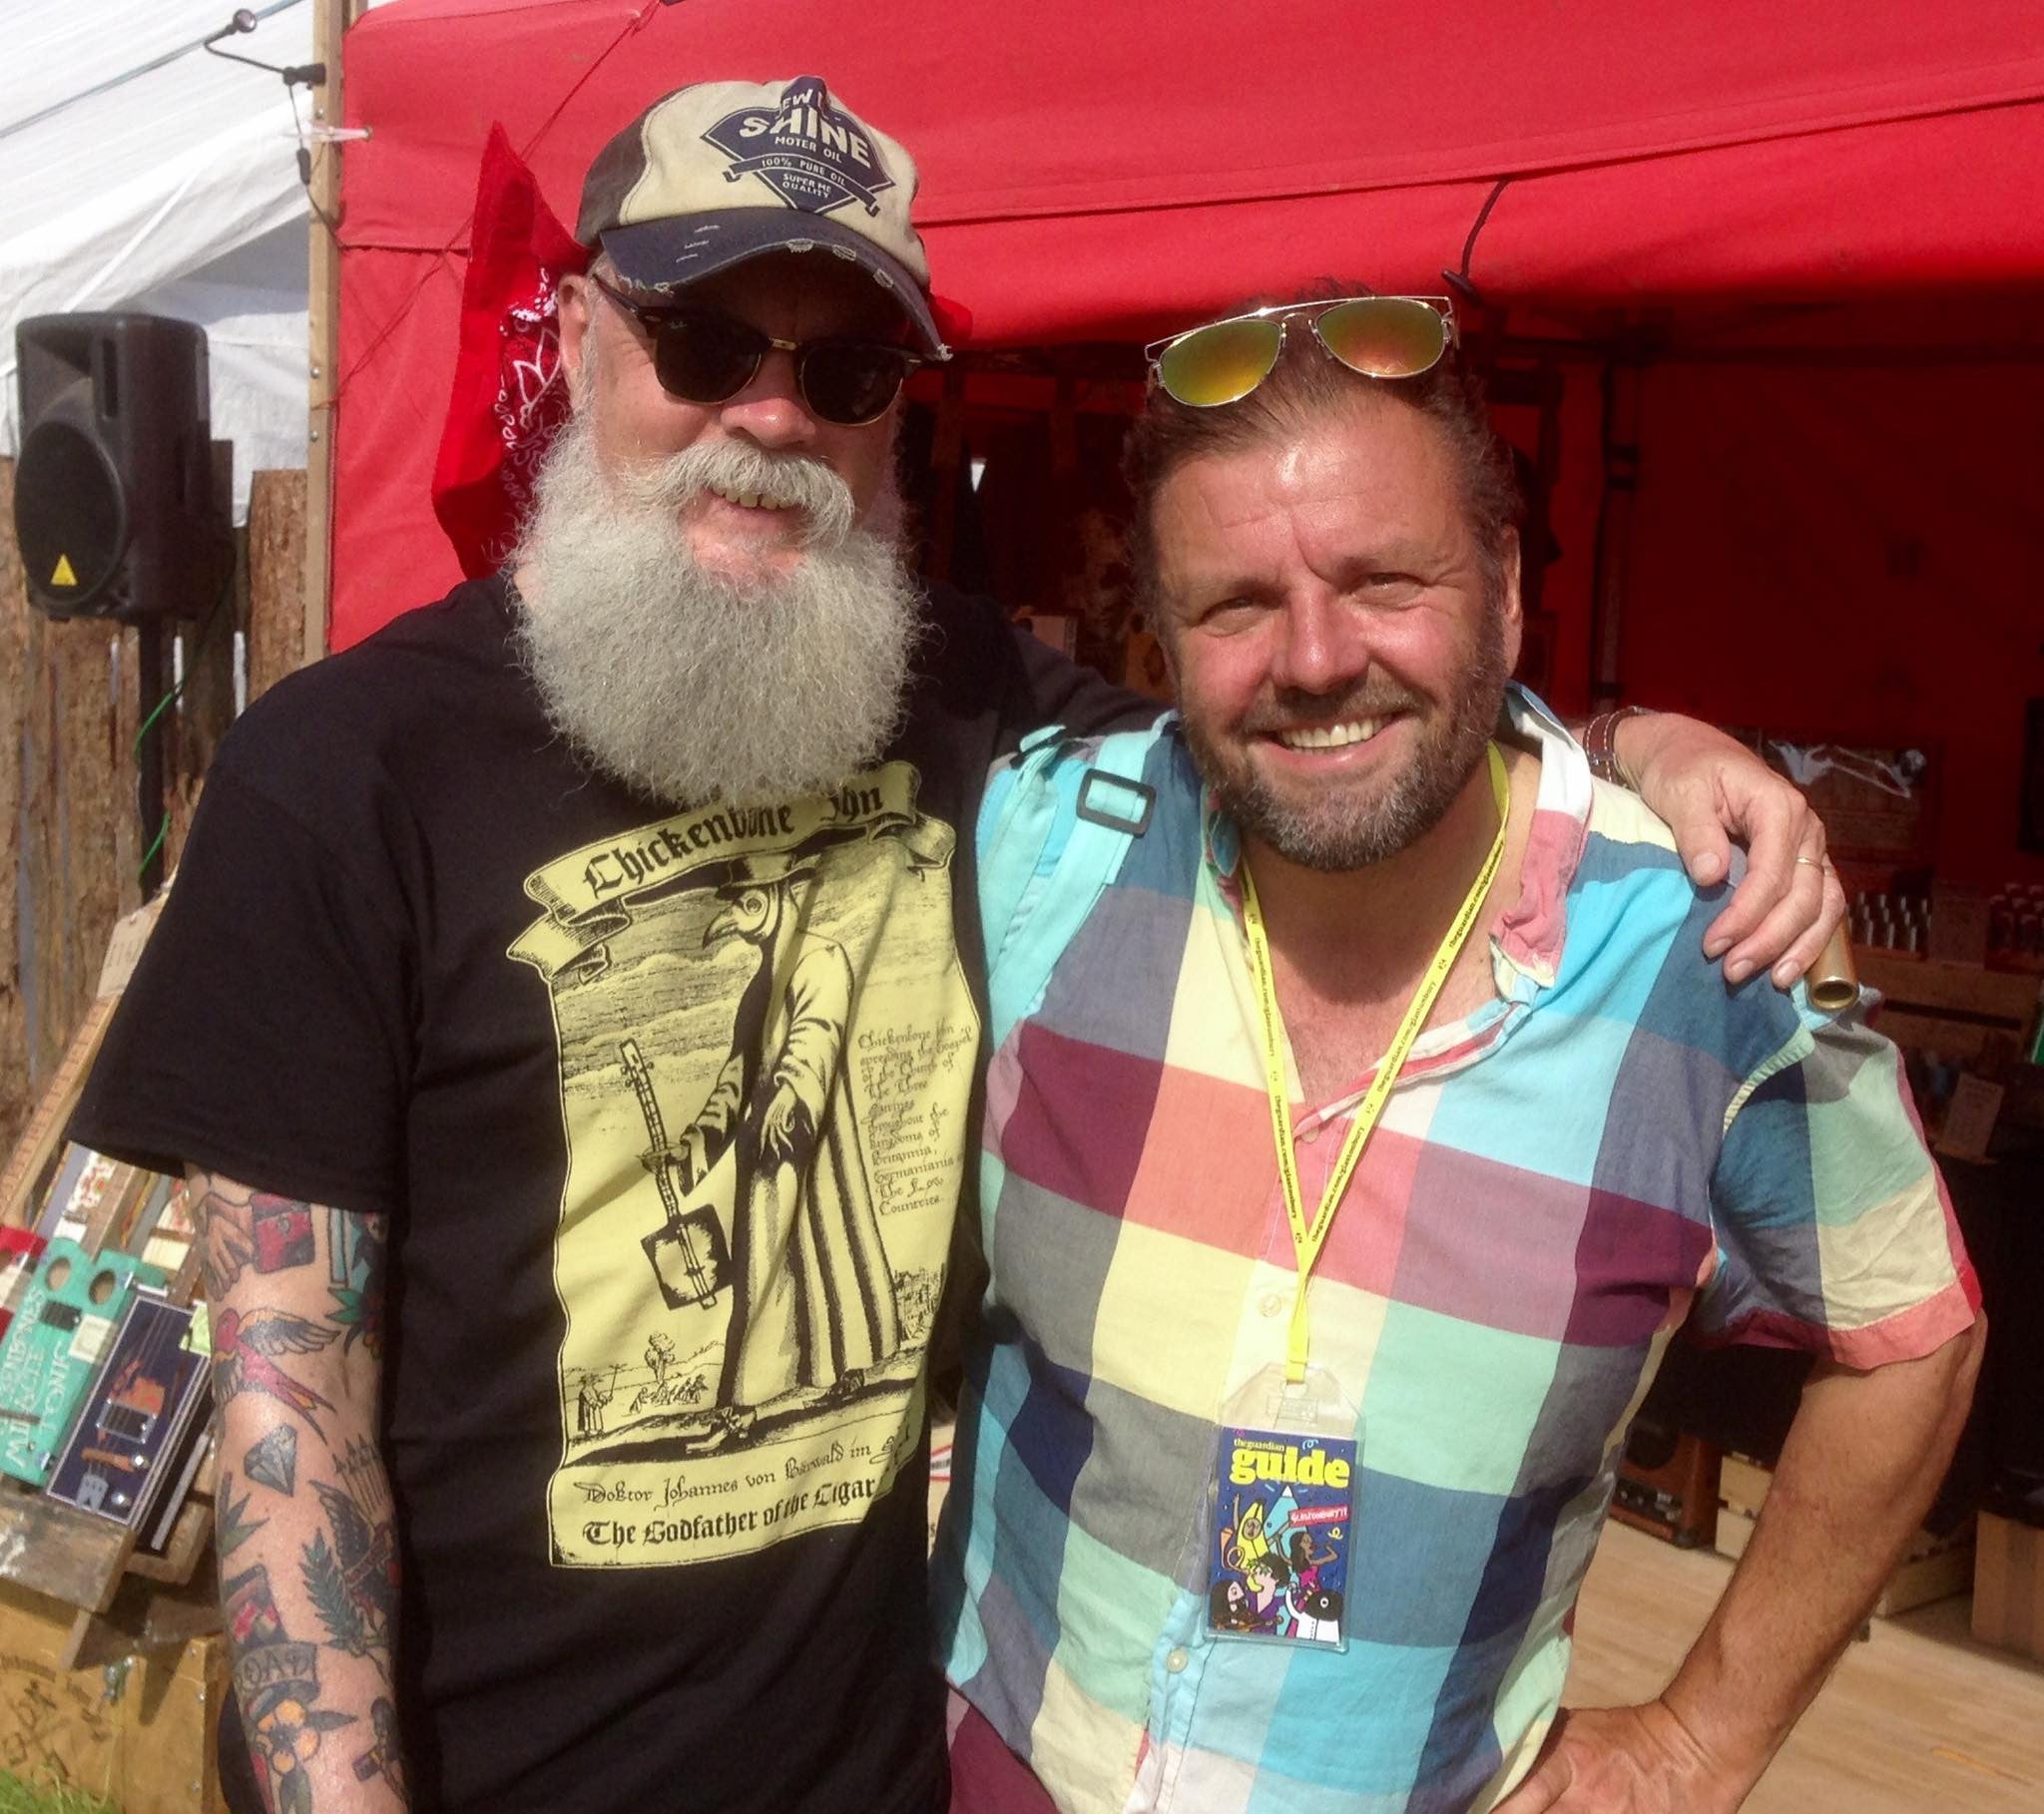
     

    Demo by Hollowbelly


    We had a little drizzle on and off throughout Saturday, hence the polythene over the PA speakers, but nothing to really affect things

    Photo credit Festival Flyer

    As well as the polythene over the speakers, we had to drape a cloth over the mic and harmonica, in order to deter people coming up the the mic and having a go. We managed to cope with this, and a request to "Can I get on the mic. mate?" was met with a firm "No, we're working here". We didn't have too many "tyre kickers", but we had to develop a way dealing with people who were just hanging around and fooling with guitars for far too long. Most people were great, very polite about asking, and grateful to be invited to have a go on a guitar. There were just a handful who outstayed their welcome, so we had to shuffle guitars around to a new customer, or somehow discover that unexplainably the amp had a problem, or the wireless mic system had run out of batteries. Speaking of which, the SmoothHound bluetooth wireless guitar transmitter system worked great. It meant that we could hand guitars around with no worries about customers tripping over leads, easily switch between guitars and walk out into the festival site still playing.


    I tried to fight my way across the crowd at the Other Stage in a vain effort to go and see Toots And The Maytals who were on at West Holts, but it was sheer madness to try and get anywhere..I reckon it would have taken me over an hour to get there, by which time they would have been off stage. Getting anywhere in Glastonbury takes ages...it it impossible to comprehend how busy it is unless you go there.

    We seemed to get attention from various film crews and accredited photographers, one of whom asked if I could play the backstage hospitality suite at the John Peel Stage. A couple of text messages later and I left Hollowbelly and Anne to run the shop while I hiked round to the John Peel tent lugging an amp, a guitar, a stomperbox and a few leads.

    Ready to go at the John Peel Sessions Bar

    I did my spot, had quick pint with Oz Cahill who was running things, then headed back to the shop. We closed at around 10pm, as after that it can get a bit too lively (i.e. too many drunks out on the spree), and we sat back of house and finished of the best part of a bottle of Jack Daniels. I suggested to HB that we might try and get into the hospitality suite again, as it was a cool place to hang out, so we wandered over, strolled up to security looking like we knew we were doing, name dropped and walked right in. We found a nice comfortable leather sofa, ordered up some more Jack Daniels and chilled out for a couple of hours. It was great to get out of the hurly burly and be somewhere relaxed before facing up to our last day of trading.

    Sunday saw us with very few guitars left, and the last of the budget line guitars were snapped up, quickly followed by the last of the Blues Box kits. Me and Anne went to the Other Stage to see Rag And Bone Man, but the press of people was immense. We could only get to the edge of the arena, and the sound wasn't too great, so after short while we decided it wasn't worth trying to get to a better spot, and went back to the stall. On the way HB phoned me to say he'd sold a guitar so we got back as quickly as we could, took a card payment and sent off another happy customer.

    We still kept selling regular guitars, with several workshop and high end ones going out, with a final sale of a top-line licence plate guitar late in the afternoon.  Anne went to bed around 11, and as we knew it would be noisy until the small hours, I suggested me and HB go for a stroll to catch the last of the festival. We wandered over to The Blues, where there as bone shaking DJ set going down, then passed Silver Hayes, where Shaggy was playing.

    Photo credit Hollowbelly

    After being thoroughly blasted with bass we followed the crowds heading towards distant balls of fire which were shooting up into the sky. The trackway cut through one of the big camping fields, and to be honest, it didn't look like a good place to camp...tents packed together with no space between them, with people sleeping inches from the roadway. It was apparent that many people were heading off, and leaving pretty much all their gear on site - tents, gazebos, sleeping bags, airbeds, folding chairs..that side of things is all a bit depressing.

    Heading over to  Arcadia we could feel the heat of the flame-spitting mechanical spider from hundreds of metres away, it truly is an amazing sight and sound experience.

    We then wandered through The Park area, which was a lot more chilled and relaxed than what we had encountered previously, traversed the hillside by the Tipi village - far more packed together than I'd expected, down by the Avalon area and into the Greenpeace club site. It's a very cool and groovy spot, under the trees, with raised boardwalks and some banging dance floors..all lit in green..and weirdly, artificial snow drifting through the air.

    By now were were looking for signs to the Pyramid stage to lead us back to base, so we headed off though the circus area through  another big market area with plenty of places still trading, and then ended up at the front of the Pyramid Stage. They were already breaking down the lighting and sound rigs, and the whole arena apron was a wasteland of paper plates, plastic bottles, cans...and the odd wrecked individual sitting in a camping chair in splendid post-nuclear apocalyptic isolation. Some of the food stalls were still trading despite it being the wee small hours, and we got back to our place thankful that we didn't have to run a business with those sort of demands.

    Monday morning saw another clear day, ideal for breaking down, so after a coffee from the local coffee shop we set about packing things down, ready to be away from site as early as we could. Anne told me that contractually we were not supposed to break the front line of the trading area until noon, so we broke down and packed away everything except the marquee roof frame and front panel. We were not supposed to be off site until 6.pm, but our previous year's experience meant that we know it could be a real ordeal getting away, so I went down to the crossroads of the main trucking route, told a marshal we were ready to move, agreed on which route to take and hurried back to the pitch.  The last of the gear was loaded into the van, one bag of rubbish put into the skip, we jumped in the van and drove off the grass onto onto the metal trackway. I'd heard a another marshal say that they'd been reminded that traders could not leave until 6.00pm, but it was 12.30pm and I was having none of that. We drove up to the trucking road, indicated left for the "Red Route" and were waved out onto the road. Our progress didn't last long, as after a few minutes we were soon caught behind a queue of articulated trucks, landrovers, cars and vans. I was determined that we were not going to have any nonsense about being allowed off site, but my worries were ill- founded, and we had an uneventful if very slow drive off site. After a wait of about half an hour we started to inch forward, stopping for ten or twenty minutes of a time, and moving an agonisingly short distance between stops. After another hour or so we were very close to the exit, by the main coach station. The traffic marshalls were very friendly and good natured, and told us that the coaches had to have priority, and that there would be 2500 of them going off site that day! Another wait, and we were waved forward, got the green light  I gunned the motor and we were out onto the open road. Well, not quite open, as there was a lot of other festival traffic coming out of the carparks, with temporary traffic lights, police and marshalls waving cars out into the stream of traffic. Hollowbelly had already phoned his wife to meet him at the place where we'd originally picked him up, and she had already arrived well in time. A steady drive through the outskirts of Glastonbury to our pre-arranged drop-off, transfer his gear  to his van, and we were on our separate journeys home. Every motorway service station on our route home (and we stopped at three of them) was overwhelmed by festival goers..there were hardly any people who weren't wearing Glastonbury wristbands.

    We were home by around 7.30pm, and loaded out the valuable stuff from the van straight away. I had a bite to eat and a beer...but I was too tired even to count the takings! So that was Glastonbury 2017- the first time for Hollowbelly, and our second, but we won't be doing it next year. 2018 is one of the "fallow years", so the next Glastonbury will be 2019... and it's time for me to start making some more guitars.

Read more…

The terrors of online window shopping

Oh no! I just had to stop myself from hitting add to cart about fifty times while window shopping on cb gitty! I only went on to look for some components for the next build and most importantly some more picks after my last one flew outta the car window on the way to work this morning. Supposed to be saving money for the wifes birthday so dont think it would have gone down well ☺
Read more…

Flying V 3 String Build Part 2

Its time to finish up this guitar. The next step is to round over the body edges. I use a 1/4" roundover bit.9353910471?profile=originalBack to the neck. I cut fret slots with a square and a Lee Valley fret saw. As this will be a fretless guitar, I will fill the slots and fret markers with dark wood filler and sand them smooth.

9353911459?profile=originalIts starting to look like a guitar but still a ways to go.

9353911655?profile=originalThe neck is secured to the back with 2 screws. This will allow for disassembly in the future.

9353911680?profile=originalHere's the neck with the fretboard and headstock veneer glued on.9353912480?profile=originalI prefer the feel of a hand shaped neck to a routered one. Even on a straight neck with no taper it makes a huge difference in feel. To me the neck is the guitar.

I start with a flap wheel on a grinder. This is very aggressive, but with careful control 80% of the wood is removed in minutes.

9353913054?profile=original9353912878?profile=originalNext I take a rasp and smooth everything out.

9353913283?profile=originalI use an orbital sander to clean up the marks and then a sheet of sandpaper and hand sand to finish it. This neck has a great feel.

9353913676?profile=originalFor side markers I could have just used woodfill but decided to show the method I usually use. After drilling the holes I cut a piece of contrasting wood into a 1/4"x1/4" strip. I sharpen it with a pencil sharpener. After applying a drop of glue, tap it into the hole. Cut it off and repeat. Sand everything flush at the end. This works very well and looks good. 

9353914276?profile=originalTo drill for machine heads I first drill a small pilot hole all the way through. Next I drill from both sides to avoid tearout. Bit sizes depend on the type of machine head being used.

9353914491?profile=originalTime for a lot of hand sanding and finishing.

I wanted a bright color for this guitar. I wanted some grain to show, so I started by diluting cheap craft paint 50/50 with water. Wiped on and left to dry. Because the guitar isn't built with the best of woods, I gave it a second coat to cover a bit more of the grain. This was followed by 4 coats of brushed on Minwax Spar Urethane with light sanding between coats. 

9353914695?profile=originalThe decal was applied after the first coat of Minwax.

9353915089?profile=originalThe nut, bridge, and tailpiece are made from pieces of found aluminum and spray painted black.

9353915891?profile=originalPositioning of these pieces is critical. This is basically a slide guitar so the bridge has no angle. Intonation is done with the slide. I will mention here that this is 24" scale. 

9353916865?profile=originalPot, jack, and knob were salvaged from an old non-working PA mixer head. There is a ground wire to the bridge. The mounting plate is cut from a scrap of 1/8" plastic. Note that the screws attaching the bridge and tailpiece are positioned so that they screw into the through neck. This adds strength and attaches the neck to the guitar top.. 

9353917652?profile=originalI measure to the center of the nut and cut that slot. I then measure equally from that point to the outsides and cut the last two slots. Because this is metal I start with a hacksaw blade and finish with a small file. 

9353917694?profile=originalTime to string it up. I like to use Darco Jazz Guitar Strings. For GDG the gauges are .024, .032, and.042. The high G is wound. This is just my preference, everybody has their own favorites. 

9353918685?profile=originalI might just add that I cut the slightest of notches where the strings cross the bridge. This holds them in place and insures good string grounding.

The only parts I purchased are the pickup, machine heads, strings and a bit of paint and clearcoat. Everything else is leftover and found items

This is not a flawless guitar.  Anyone who picks it up will immediately know it is homemade. This is its charm. I will spend a bit of time on setup and it will play perfectly..

Build time is around 20 hours.

I hope there is some useful information here. 

Thanks for looking.

9353920461?profile=original

 9353921701?profile=original

Read more…

Flying V 3 String Build Part 1

 I recently built an Explorer for the 2x4 contest. It turned out to be a terrific guitar, so I decided to use the same build techniques for a Flying V. I decided to do the build thread in two parts, as there are lots of pictures. 

I gathered up the wood to start. Two pieces of old maple flooring for the neck and fretboard, some leftover 1/4" pine tongue and groove for back and top, and a couple chunks of 2x4 spruce for the sides. 

9353904454?profile=original

After cutting the tongues and grooves from the pine they were glued into a panel.

9353896901?profile=original

The next step was to start the neck. The maple was cut to 1 1/2" width and planed down to 5/8".

9353897680?profile=originalI cut my scarf joints on the bandsaw and clean them up on my 6" belt sander. After glueup I add the wings.

9353898101?profile=original9353898289?profile=originalAfter sanding the panel to level I laid out the top and back. I just used dimensions that fit the panel and looked like a V. Cutting was done on the bandsaw and the edges were cleaned up on the beltsander.

 9353899055?profile=original9353898867?profile=originalThe scrap 2x4 was cut into 1 1/2" x 1/2" strips. These are the guitar sides. I cut the angles and lengths and they were then glued to the back.

9353899455?profile=originalAll the side pieces glued and support piece added to the neck.

9353900091?profile=originalTime for cutouts on the top. Lots of ways to do this but I use my scroll saw. I have a nice humbucker for this guitar. It will have a volume pot and output jack on the front.

9353900887?profile=original9353901275?profile=originalThe neck is now aligned with a bit of back angle to get good bridge height. Blocks were glued in to bring it to the right level. The top will be glued on with the neck removed. 

9353903277?profile=original9353903482?profile=originalThe completion of this guitar will be in Part 2. Thanks for looking.

Read more…