All Posts (1994)

Sort by

Another one note song.

I've been at it again, finding a few useless notes, one string at a time for anyone that may want. This time I've gone non-PC with the attached.

If you're having a party with a Piñata then maybe this could come in useful.

LaCucaracha.pdf

Have fun, whatever you're doing!

Read more…

3 stringed fretted CBG tuned to GDG

Hello Guys,

I am new to the CBG as well and do not understand a lot of the musical terminology, however in support of some previous posts by other members, I would like to post the following:

  • My fretted 3 string guitar is tuned to GDG;
  • Is there anywhere I can buy, acqire etc, a list of chords for this guitar's configuration i.e a diagram of the fretboard showing the positioning of each chord and where it sits on the fretboard?

Thanks for any help Bob

Read more…

Black Friday 2x4 lapsteel

Shane Speal had a great suggestion this week - build a guitar for Black Friday!  I was in the process of building a 2x4 lapsteel (based on the design Shane has shared here on Cigar Box Nation) so I made it my goal to finish up by today - Black Friday.

The design was very similar to the original Shane posted.  Nothing fancy, but they sound surprisingly good.  I've built two prior to this one.

I was initially going to use a Teisco Dey Rey surface mount pickup from C.B. Gitty, but in an earlier blog post you will see how I modified the pickup.  I also used a terminal bridge that I have written about previously.

During construction I did one thing I had not previously, I bored a hole from the butt end down one side about 8 inches deep to use as a channel for the pickup wires.  I grounded the bridge externally to the jack plate.

It came out pretty good I think.  It sounds good through my really cheap amp.  I hope to get a good sound check this weekend at church where I have access to good guitar players and good sound equipment.

Here are a few pictures with notes (some are on Facebook already):

9353850282?profile=originalThis is the hole I bored for the wiring channel.  It ran about 8 inches into the guitar body.

9353851868?profile=originalI used a Forstner drill bit to open up a cavity for the jack plate and amp cord plug.  You can see the wiring channel bore hole where the pickup cabling runs.

9353852086?profile=originalThat is the terminal lug bridge and pop-rivet string holes through the body.  I used pop-rivets on the underside also so the strings don't get pulled through.

9353851893?profile=originalThe headstock showing screw eye string guides and a red oak moulding nut.

9353852279?profile=originalThis is what the pickup looks like mounted on the body.  Wires run underneath into the bore hole channel.

9353853865?profile=originalYou can see the external ground wire running from underneath the bridge cross member to the jack plate.  I used solder removal wicking material, it is a braided copper wire basically, it makes a good ground wire.

9353854269?profile=originalFrets are silver Sharpie.  These are my favorite (for now) fret markers.  Paw print stickers from Hobby Lobby.

9353855281?profile=originalI use a very simple finish - Sanding Sealer applied with a paper towel.  It is pretty tough, dries quickly and looks pretty good.

9353855855?profile=originalHere is an overall look before I put the small wooden badges from C.B. Gitty on.

Hopefully I can post a good sound check this weekend.  I think it sounds good, but I don't play.

Great idea Shane - this one is going to be a Christmas gift!

Read more…

Resonator with real cone.

9353849062?profile=original9353849853?profile=original9353850252?profile=originalHi All, I just strung this CBG up and had a bit of time to spare so I thought I would post it. I still have to do some setting up and mods, that's why the strings have not been trimmed as I have to remove them later.

It has a tone pot and a pan pot that blends the magnetic and piezo pickups. I had to use the peghead overlay to make the tuner holes smaller at the front to take the smaller tuners I used.

Thanks for looking Taff

Read more…

Pickin one note at a time.

Don't really play anything (yet), but saw a video of a CBG and have started making one.

In the mean time I have tuned a Ukulele to the open G (GDgB) and picked out the Chorus to Casey Jones (Grateful Dead).

Help out and give us the rest or the full Tab for it if you'd like.

CASEY%20JONES.pdf

The .PDF says for 3 string but it would be the same when only picking the single note if the B string where on your CBG (placed at the top of the other 3 strings on the .PDF, but you probably knew that).

Read more…

Modified C.B. Gitty Teisco Del Rey pickup

I'm building a 2x4 lapsteel this week and I wanted to use a C.B. Gitty Teisco Del Rey pickup on it.

9353865084?profile=originalShane Speal has given these pickups a good review and the way they are made gives a lot of different mounting possibilities with the "wings".

9353865882?profile=originalI folded the wings over and the pickup was going to fit nicely over the body of the 2x4 - I had trimmed it down just a bit, removing the rounded over edges.

9353867060?profile=original

As I sat and looked at this pickup I thought I'd try something.  The cover of the pickup is held on by just two small screws, so I removed them and took it all apart.

9353867466?profile=originalThere really isn't much to it and there was only a little bit of glue on the inside.  A coil, bar magnet and the wires are all that is inside the metal case.

9353868254?profile=originalThe gold foil look comes from a piece of gold foil pattern paper underneath the holes.

Everything came apart easily.  One note - if you do use one of these pickups and cut the main cable - the yellow lead is the Ground.  You can see in this picture and I did check it with my Ohmmeter. 

9353867890?profile=original

9353868875?profile=original

The coil is just over 1/4 inch thick, 1 inch wide and 2 7/8 long. 

9353869676?profile=original

9353870299?profile=original

9353871261?profile=original

Next I grabbed a scrap of pine that is just over 1/4 thick, marked and cut out a hole for the pickup coil.

I didn't worry too much about precise cuts on this, you really just need to get the coil in the cavity and squared up - but it won't be too critical I don't think - and this one is a test.  I will tighten up my work on the next one if I like this design.

9353870886?profile=original

9353872058?profile=original

9353872458?profile=original

For the top I used a piece of the 2x4 lapsteel body scrap I had trimmed off.  It is about 1/16th thick - maybe a hair over that.

9353872865?profile=original

Glued up the wooden casing.

9353873268?profile=original

After the glue setup I did a little fitting and sanding.

9353873084?profile=original

Haven't applied a finish yet.

9353874264?profile=original

Total depth when finished is just a hair over 3/8 inch.  Not exactly a flatpup, but I can make it work on this lapsteel and possibly other builds.  I will hold the pickup inside the case with a couple dabs of hot glue or Goop (Goop is an all purpose glue I use, it works very well for a lot of applications)

9353875463?profile=original

And here's what it looks like on the lapsteel body.  I'll have to sand it a bit more and use mounting screws along the edges, keep the string height low to the pickup, but I think it will work.  I may give it a contrasting color finish so it stands out a bit more.

9353876267?profile=original

This gives this pickup a different look without a lot of effort.
Read more…

We recently posted this Instructable describing how to install a Cortado balanced-out pickup in a banjolele. This pickup runs into a little circuit that balances the signal and matches the impedance to a mixing console -- similar to a preamp or active DI. The instrument plugs straight into a mic line. (The console has to provide phantom power to the circuit.) This provides much wider bandwidth and higher signal-to-noise than you usually get from a piezo pickup.

In short, we simply removed the sound board, stuck the piezo to the head below the bridge, stuck the shielded circuit to the inside of the instrument with Velcro, stuck the mic jack to the outside, and replaced the sound board.

9353862889?profile=original9353863687?profile=original

9353864088?profile=original

Read more…

Building Jaime

After a few varied builds - lunchbox, Christmas tin and even a few cigar boxes, I decided to build my 'player'. Truth is I kind of felt like these builds were all experiments and it was time to get serious-ish.

9353858279?profile=original

Enter Jaime Garcia. This 'My Father Cigar' box is beautiful, simple and well constructed. Thin top and bottom. Although they are plywood, the tap tone was promising. It measures 10-3/8" x 7" x 2-3/8".

For this build I decided on a couple firsts for me: (1) put the tuners at the tail and (2) get a decent break angle at the bridge. The tuners weren't a challenge, just new. But getting decent bridge height was definitely breaking new ground.

For reasons unknown to me I am reluctant to cut my neck. So how do I get 3-degrees of angle? My answer came in two parts. By offsetting my neck-through entry and exit points I could get 1-1/2 degrees. And if I built a 'thickness-tapered' fretboard I could get another 1-1/2. Voila! 3 degrees and 5/8" inch of string height at the bridge.

The volume is improved over my prior builds. The sound is more guitar-like. The short of it is that Jaime is a joy to play! I'll upload a sound sample in the future.

Here are some photos of the project.

I am still quite new at all this and welcome your thoughts - even critical ones.

Cheers!
   Robert

9353858860?profile=original

9353859091?profile=original

9353860060?profile=original

9353860690?profile=original

9353861858?profile=original

9353862275?profile=original

Read more…

Reso mounting

Started work on kitty bowl three string and have seen the common screw around rim to soundboard mount.  It appears to be most accepted method but somewhere (at Nation?) read someone`s directive not to attach directly but to float reso with washers between wood and steel rim. Would it matter?

Read more…

I used an old 100 years old Benson and Hedges cigar box guitar for this one (I had it authenticated).

The neck is maple, with a second layer of maple for the finger board.

All the hardware and frets is golden, and it boast a piezzo pick-up under the bridge.


I weaved 3 triple strands of burlap to keep it looking period correct.


Tell me what you think...

9353854670?profile=original

9353855874?profile=original

Read more…

Cable tie frets

9353852653?profile=original

I was looking for a way to mark out the frets on a lap steel I'm building and thought this might be of some use to others building any type of fretless guitar.

After marking out and cutting the slots like I would do if using fret wire, I used a hacksaw to widen the slots out to hold a 4" plastic cable tie. The hacksaw blade was the perfect size.9353853056?profile=originalI cut the slot deep enough to allow 3/4 of the cable tie to set in the slot. I then drilled out the fret markers and used white glue to install the ties and markers. Simply run a bead of glue over the slot and push the tie down and across with your finger. This will spread the glue evenly in the slot. A damp paper towel was all that was needed to clean the glue off the board.9353853883?profile=originalAfter allowing the glue to dry, I cut off the ends of the cable ties and sanded everything flush going up to 320 grit. A palm sander could be used to knock the plastic ties down even with the board, but I simply used a sanding block. The plastic works down pretty fast. A few coats of Danish oil to seal the board and this is the results.9353854280?profile=originalThese cable ties come in many different colors and are pretty cheap to buy. As the picture above showed, I cut the large markers out of a medium black pick with a 1/4" paper punch.

I'm very happy with the way it turned out. You could put a thin strip of wood on each side of the board to give it a binding look and cover the ends of the ties, but I'm leaving this one as is. I hope this has been helpful and someone gets some use from it.

Read more…

Electrical Aisle bridge

On the latest build I completed, I needed a bridge that would give me two things; low action and a good place to get a ground for the strings because I had built this guitar with an internal P90 pickup.

Walking down the electrical aisle in my local big box store I spied these terminal lugs.  I turned them this way and that way and figured out a way I could fashion a bridge from them.

9353848098?profile=originalI took them home to my shop (basement) and started fabrication.

It was actually pretty simple.  First I took a stainless steel screw and cut the head off.

9353848856?profile=original

I loosened the set screws in the top of the lugs and put the screw into the holes - making sure I pushed them all the way to the end for the set screws to sit square and level when I tightened them.

9353849265?profile=originalThat's is - the bridge was complete.

9353848697?profile=originalI mounted it on the guitar and it gave me the nice low action and good ground that I needed.  I attached the ground on the inside of the box at the end of one of the screws holding the bridge to the box.

9353849498?profile=original9353850652?profile=originalDisregard those two brass screws under the bridge.  Earlier attempts to bridge and ground created those holes.  I filled them with screws to cover the holes.

The action is nice and low and the sound volume is good from the internal pickup.  This worked out well.

There was also another style of lug and I picked up a couple of them and mocked up a different style bridge.

9353850864?profile=originalOne good thing about these parts was the price, they were only a couple dollars a pack, each pack had 2 lugs.

9353850496?profile=originalLoosen the set screws and seat the bridge screw.

9353851258?profile=originalIt looks a little different from the other side.

9353852061?profile=originalIn summary these parts seem to be pretty well adapted to use as a bridge and they only cost a few dollars.  By changing the diameter of the screw you use for the bridge piece you can adjust the action height a bit.  I'm sure there are other tweaks one could do to these.

Read more…

Dog Bowl Reso

9353846858?profile=original9353847259?profile=original9353846691?profile=original9353847857?profile=original9353847895?profile=originalHi All, I thought I would have a go at a resonator CBG. I have built full size Dobro style and solid body  resonator guitars, but this is my first CBG using a dog bowl as a resonator. The next one will use a proper cone. The box in this CBG is again made out of fence palings from around my yard. It has a Piezo pickup system with volume and tone controls. Can you find the Volume pot/control?

I'm playing with bridges looking for a suitable sound, as you can see the biscuit type bridge is on it at the moment and I'm slowly modifying it.

Any way enjoy Taff.

Read more…

CORTADO Balanced Output Piezo Pickup

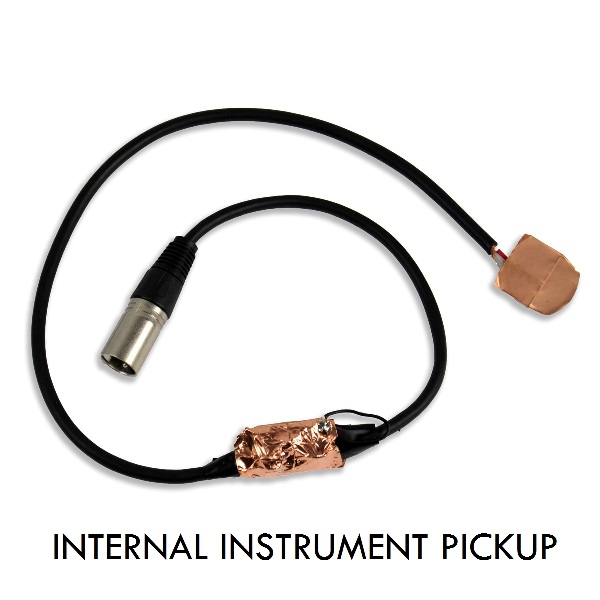
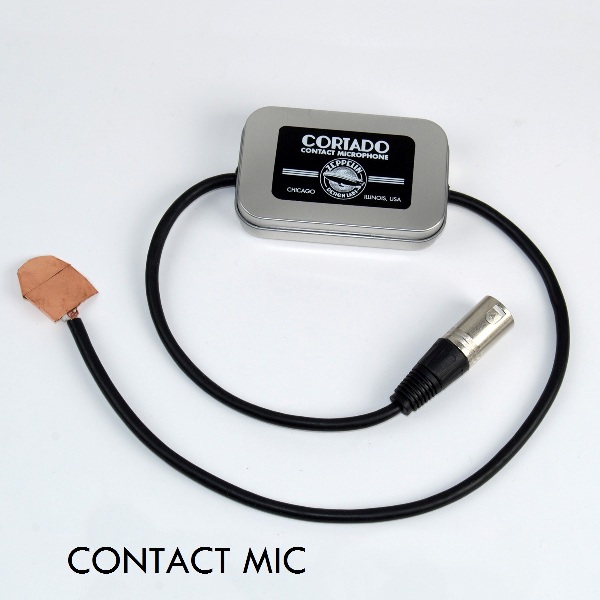
Zeppelin Design Labs has released the Cortado piezo contact pickup. What makes this pickup unusual is that we run the signal through a buffering / balancing circuit, which matches the high impedance from the piezo to the low impedance required by a recorder or mixing console. The Cortado has a XLR male jack for output. You can plug your CBG straight into a mic cable and direct to front-of-house. This pickup delivers a spectacular signal-to-noise, and a flat response across a wide frequency range. The result is a bright, clear signal that can easily find its place in a mix.

Cortado-Surface-Contact-Mic-caption-sm.jpg?width=500

This guy comes in a DIY kit, or ready-to-play as shown above. The ready-to-play mic can be stuck to your CBG with a piece of tape. The kit can be configured more as a pickup and installed inside the guitar.

Cortado-Pickup-caption-sm.jpg?width=500

Most CBG players are not playing in big bands where they get lost in the mix, I know. But as a DIY guy, you may find this device intriguing in its own right.

Read more…

BIG Thank You!!!!

Earlier this week I posted a problem I was having with my guitars.  No matter what pickups I used, I always got an annoying buzz and needed to sort it out.  I've only been at this about 3 months and suffer from the Newbie Blues, making obvious mistakes and a little timid to ask for help.

I received over 70 replies between my post and messenger.  EVERY SINGLE ONE of them were supportive and helpful.  I probably learned more about guitar electronic basics in one day than 15 years playing them and definitely more than the 3 months I've been struggling to figure them out.  Turns out the problem was a combination of less than ideal grounding and florescent lighting I use in my work space/private rock venue/basement.  (There's a funny anecdote about me walking my basement/shop holding one end of a guitar cable with the other end plugged in to a 30 watt amp on my kid's skateboard pointing it around like a divining rod looking for hum)

I want to thank everyone in this group from the seasoned professional to the guy that wants to try it just because he's got a bunch of scrap wood lying around and thinks "why not make a guitar?" for their support and generous sharing of information.  It's easy to get discouraged when you try something new and keep making the same mistakes.  Thank you all for getting me over that hurdle and giving me something I can share with the next guy that has the same problem.

You guys ROCK!

Read more…

CBG pickup blues

I attempted to build a CBG and adding a pickup for some sound but I had some snags. Cutting into the neck to install a pickup just seems to take a lot of strength out of the neck and even though it is probably fine for a 3 string I am having issues getting the height right. Does anybody reccomend a thinner pickup that works well or a good design for the neck cut? Thanks
Read more…

Barnes and Noble

hey everybody, If you ever get into Barnes and Noble look in the gifts section. I don't know if all the stores have them ,but here in Rockford Ill. they have a short scale "Cigar Box" guitar for $30 bucks. It's got every thing in the package. I didn't buy one ,but I just wonder if They are any good. They look cool. I might have to break down and get one just for kicks.  Cheeper for what I can make a nice one for.  Just thought I'd let y'all know.  Shalom!!

Read more…