OK, I know I'm a newbie to the cbg community and just completed my first build of three cbg's that were Christmas presents, but I'm into my next project which is a steel string baritone ukulele scale instrument. I noticed in the three instruments I completed before Christmas that the action height was inconsistent but similar and on the high side. I want to make an instrument specifically for my daughter who plays baritone ukulele. https://www.youtube.com/watch?v=lfjajQRJQlc&feature=mfu_in_order&list=UL and https://www.youtube.com/watch?v=iO1_aLsumrk
Her playing style is primarily fingerstyle and I want the action as low and as comfortable as is possible.
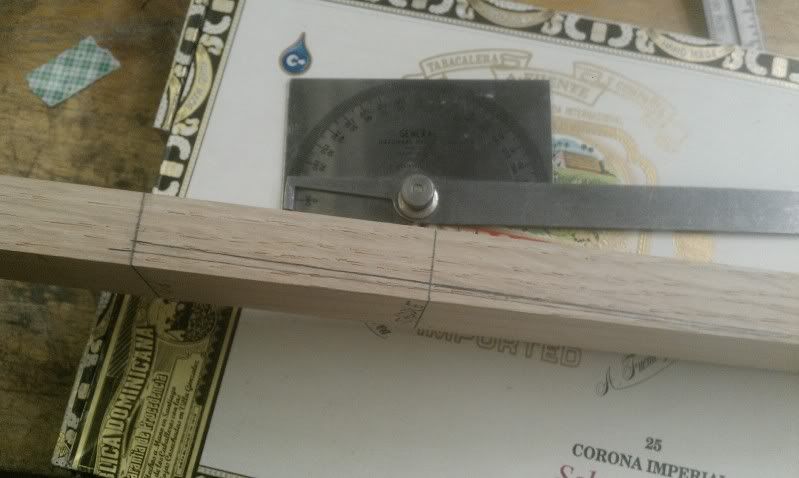
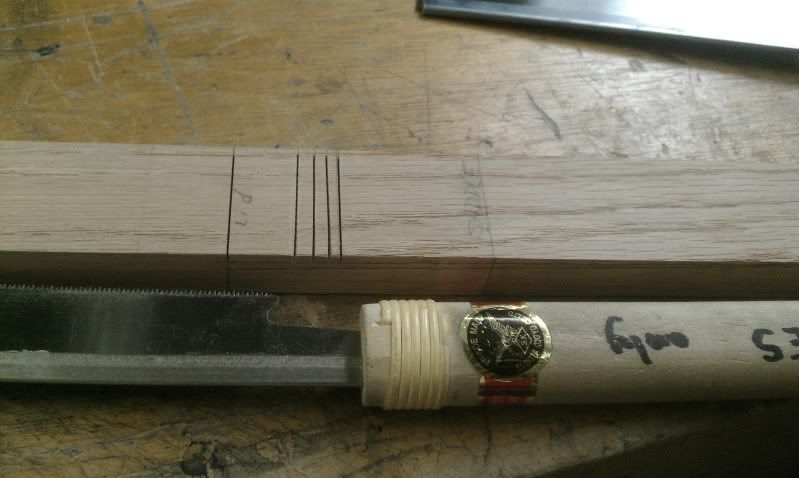
I'm planning a very slight taper on neck width from the nut to the body, but haven't done the math on that yet, but regarding string height I am pitching the neck back initially at a 1/2 degree angle. I plan to get the instrument together and strung up and then adjust the set of the neck as needed. I did the initial work on the neck yesterday and took photographs. Any comments, thoughts, or suggestions are not only welcome but solicited.

Replies
Ms Charlotte ,,, I like a low fret action.. not into slides to much .. the notch at the head stock end i'll cut it just deep enough to b even with top of box ,,, at the tail end i will cut it 1/8 inch deeper than the front ,,, Alos I use ms Diane frm Chicago zero fret a lot ,, I got the jumbo fret wire from Gitty and it puts the clearance high enough ,, This allows me to make,,use just about any type bridge that i want ,, from the top of the 12 fret ,, usually set strings at 4 to 6/32 ,, sometimes i have gotten a buzz and had to dress a fret down ,, but only once or twice .
I seems to me that the 1/8 inch lower at tail end set the neck angle just right ,, works whether i use a fretboard or not,, tru the body or flush inside My @ cents !!!
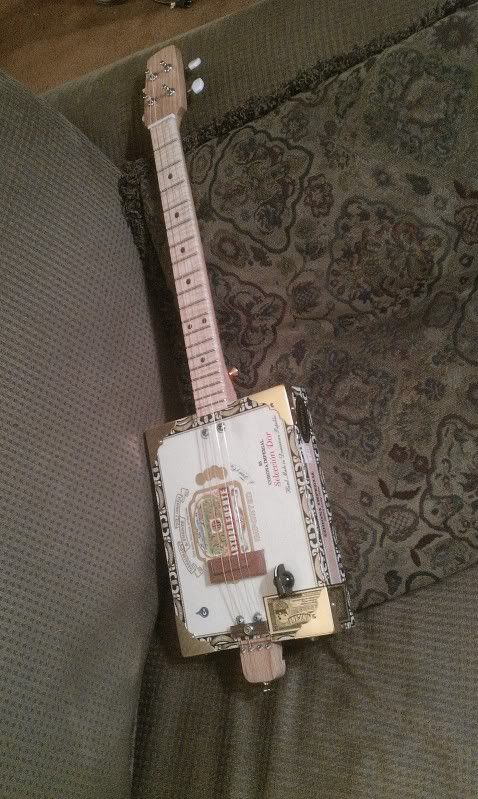
Realized I never posted the end result. The action on this baritone ukulele scaled cbg is really low and I had very little fret work to do. It is very playable and I strung it with light gauge strings. I learned a lot from this build and made a couple of missteps on the instrument that I was able to fix without compromising the the instrument in any way.
Nice grain in the neck, and the brass corner pieces are always a nice touch.
I think it must weigh 15-20 pounds.=;o} I was kind of amused with myself on clamping it up. Fwiw, the folks at Titebond say that optimum clamping pressure is in the neighborhood of 100 lbs per square inch because it forces the glue into the wood fibers. Forty or more lbs produces a decent joint. When the piano shop I work at glues braces to a piano sound board they use air pressure clamping and get about 45 lbs per sq inch on the braces. The Steinway & Sons factory still uses go bars. I've seen their go bars in action and they are substantial in size but not sure how much pressure a go bar exerts. People have been using them for centuries, so whatever works is good.
Dan Sleep said:
I think I read somewhere that a good neck angle was 2 degrees, but I don't recall where I saw that, a post by Skeesix maybe?
And yea, the down pressure on the bridge is a limiting factor on how much you can lower the bridge without negatively affecting the break angle.
I was actually going to do another beginners video on getting the action set properly, since so many newer builders "finish" their build, only to find that the strings are reallllly high.
Charlotte Henry said:
Thanks for the reply Dan. My thoughts were that 0 degrees on a neck set produced high action on 3 guitars, so 1/2 degree seems like a pretty safe start and since I'm screwing to the lid rather than gluing, dis-assembly is a breeze. Once I get the instrument to a point where it can be strung I will work on bridge and saddle height and/or adjusting the neck angle. Nut slotting is a constant. The depth of the string slots is primarily based on fret height so my further adjustments are to deepen the angle of the ramps and adjust the the height of the bridge and saddle.
You are correct that too much back angle is a bad thing, but when a 1/4 inch threaded rod bridge is giving action that is too high, reducing the height of the bridge with strings that are coming from a tailpiece is at the same time decreasing string down pressure on the bridge.
BTW, I forgot to mention in my first post that I'm planning on putting a radius on the fretboard, probably 16" which is a Martin radius.
Another thing I forgot to mention was the height of the fingerboard above the lid. I use standard 1/4 inch red oak most of the time and it seems to work out pretty well. If I go much smaller than 1/4 inch, then I have problems getting the action down to where I want it.
Getting the action set low is one of the toughest things to work out. The nut and bridge height, the angle of the neck, the size of the strings, it all has to come together at the same time.
Angling the neck works pretty well, but you have to be careful that you don't wind up having the neck leaning backwards too much, or you wind up with the strings running exactly parallel to the fingerboard. If that happens, you run the risk of buzzing strings when you fret a note because the strings touch the fret that is ahead of the one you are fretting.
One thing that helps is to make each component "adjustable". By that I mean screwed as opposed to glued, glued lightly to allow easy removal, etc. That way you can tweak it a bit when required. You are often talking only a few thousands of an inch between success and failure.
Hope that helps somewhat.
In the first photograph you will notice two lines on the side of the neck blank. The first line is 1/2 of a degree and the second is 1 degree.
LOL!.. if you put any more clamps on it, you would have to find a bigger stool.
Charlotte Henry said:
-
1
-
2
of 2 Next